Whether you're after beachy waves or sculpted curls, here's how to curl your hair with intention—no breakage, no guesswork.
When you’re staring down a curling iron, it can either feel like your best friend or a mysterious hot tool with a mind of its own. But learning how to use a curling iron doesn’t have to be intimidating. The right technique is about understanding your hair’s needs, knowing what kind of curl you want, and learning how your tool interacts with your texture.
Whether you’re styling long, thick layers or figuring out how to master curling short hair, this guide will help you prep, section, curl, and finish your look with intention. Best of all? These methods work with your natural texture, not against it.
Step 1: Start with clean, dry, protected hair
Curling clean hair isn’t just a suggestion—it’s essential. Excess oil or leftover product can cause uneven heating or reduce hold. Start by washing and conditioning with products that hydrate and strengthen. If your hair feels dry or coarse, skip clarifying formulas and opt for moisture-boosting options instead.
Once hair is towel-dried, apply a lightweight, heat-protective leave-in.
Try this: Our Moisture Hydrate & Heat Protectant Spray is designed to guard your strands from high heat while adding just the right amount of slip and shine. Use it before blow-drying or flat-ironing, and especially before any curling iron session.
Make sure your hair is fully dry before styling—curling damp strands is a one-way ticket to damage.
Step 2: Pick the right barrel size for your curl goals
Before you even clamp down on a section, decide what kind of curls you’re after.
-
For tight, defined curls: Choose a ¾” or 1” barrel.
-
For medium, polished waves: Try a 1.25” barrel.
- For loose, beachy texture: Go with a 1.5” to 2” barrel.
Larger barrels create looser waves, while smaller barrels give tighter ringlets. It’s also important to think about your hair’s density and length. Finer hair usually holds curl better with smaller barrels, while thick or long hair may benefit from wider ones for ease of styling.
Step 3: Section strategically
This step makes or breaks your styling session.
Start by dividing your hair into sections:
-
Top, middle, and bottom layers (if your hair is long or thick)
-
Left and right sides
- Crown and nape (for added volume control)
Use clips to keep sections separate. Working in smaller 1-inch segments ensures even heat distribution and longer-lasting results. It also keeps you from overloading your iron, which can cause kinks or inconsistent curls.
Pro tip: Always start with the bottom layer and work your way up to the crown. This gives your curls time to cool and set as you go.
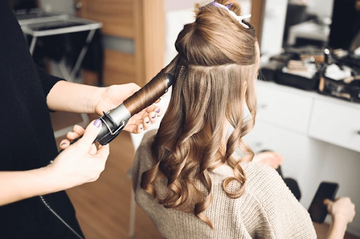
Step 4: Master your angle
This is where TYME techniques shine.
For polished, modern curls:
-
Hold the iron vertically for waves and spirals
-
Hold it horizontally for tighter, bouncier curls
- Wrap hair away from your face for a more natural shape
If your curling iron has a clamp, open it, slide it mid-way down the strand, and then twist the iron while guiding it through the ends. If you’re using a clamp-free wand, start wrapping mid-shaft and leave out the ends for a beachier, undone finish.
Let each curl heat for 7–12 seconds depending on your iron’s temperature and your hair’s thickness. Don’t exceed 15 seconds to avoid heat damage.
Step 5: Let it cool, then shape your look
Once you’ve curled each section, resist the urge to run your fingers through right away. Letting curls cool fully before touching them helps the shape hold.
-
Want bouncy, defined curls? Leave them as-is.
-
Want looser, tousled waves? Rake your fingers or a wide-tooth comb through them once cool.
-
Need extra volume? Gently backcomb at the root before separating the curls.
For extra hold and shine, finish with a flexible hairspray or light mist of glossing serum.
How to curl short hair with a curling iron
Styling short hair with a curling iron isn’t harder—it’s just different. The trick is to work with your length, not against it. With the right tool and approach, you can create everything from soft waves to defined texture that enhances your cut and frames your face.
Choose the right barrel size
For short hair (think chin-length to just above the shoulders), opt for a ¾-inch or 1-inch curling iron. These sizes let you wrap even the shortest layers around the barrel with more control. Oversized barrels tend to be too bulky, which means your hair won’t hold the curl as well.
If you’re using the TYME Iron Pro, the angled design helps you get close to the root without burning your fingers—perfect for shorter cuts that need volume and lift.
Focus on layering and placement
Start by sectioning your hair into at least three parts: bottom, middle, and top. Since the bottom/nape area is often hidden or very short, you don’t need to curl every strand there. Instead, focus on the crown and top layers, which will have the most visual impact.
For added dimension, alternate the direction of your curls. Curling every piece the same way can make short hair look overly uniform or stiff. Mix it up—some away from the face, some toward it—to get that tousled, effortless finish.
Use curl direction to frame the face
A great trick for short cuts like bobs and lobs: curl the front pieces away from your face. This opens up your features and creates lift around the cheekbones and eyes. If your cut has layers or a fringe, curling these outward can add softness and shape without overpowering your style.
Keep it light on product
Short hair can get weighed down quickly. Use a light heat protectant spray (avoid creams or oils) and skip heavy-hold hairsprays. Once styled, a texture spray or dry finish mist will give body without buildup.
Final touch: finger-comb for separation
After your curls cool, gently run your fingers through them to break up any tightness. This softens the look and makes your curls feel more natural. You can also use a wide-tooth comb or styling brush if you want a looser wave.
Curling iron safety and temperature tips
Always start on a lower heat setting, especially if your hair is fine, fragile, or color-treated. Many people overestimate the heat they need. Here’s a rough guide:
-
Fine or damaged hair: 280–320°F
-
Normal or healthy hair: 330–370°F
- Thick or coarse hair: 380–410°F
Invest in a curling iron with even heat distribution and adjustable temperature controls. Irons with ceramic or titanium plating are often best, as they reduce hot spots and smooth the cuticle in the process.
How to maintain curls that last
You styled it. You nailed the look. Now comes the part where most people struggle—making your curls last longer than a few hours without frizz, droop, or flat spots.
Let’s break down what really works:
1. Be gentle when detangling
One of the quickest ways to kill a curl is by brushing through it. Instead of using a fine-tooth comb or bristle brush, gently separate curls with your fingers or a wide-tooth comb. This helps maintain the integrity of the curl pattern without adding unwanted frizz or disrupting the shape.
Pro tip: Wait until your curls are fully cooled before touching or loosening them. That cooling period is what “sets” the shape.
2. Protect your curls while you sleep
Overnight friction is a major culprit for flattened or frizzy curls. If you want your style to last more than a day, how you sleep matters:
-
Use a silk or satin pillowcase to reduce friction.
-
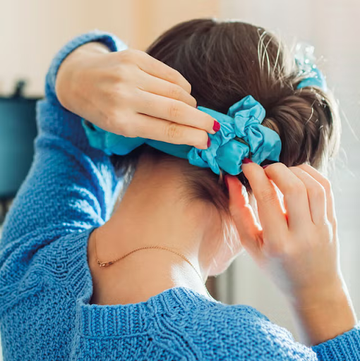
Gently “pineapple” your hair by gathering it into a loose, high ponytail secured with a soft scrunchie. This keeps curls lifted and prevents them from being crushed.
- For short to medium hair, a loose silk scarf or bonnet can help preserve the curl shape without stretching it out.
3. Humidity-proof your curls
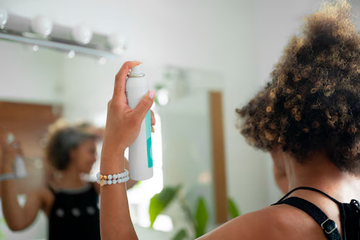
Moisture in the air can cause curls to expand and lose definition. Lock in your style with a humidity-resistant product that helps form a lightweight barrier. Look for:
-
Anti-humidity finishing sprays
-
Lightweight serums with silicones or polymers
-
Frizz-fighting glosses that seal the cuticle without weighing your hair down
Avoid heavy products that create build-up or flatten fine hair. The goal is bounce and hold—not stiffness.
4. Skip the full redo—just spot-style
The next day, don’t reach for the curling iron to redo your whole head. You’ll overheat your strands and lose volume.
Instead, focus on touch-ups:
-
Revive the front pieces and crown only—these are the sections most visible.
-
Use a curling iron on low to medium heat.
-
Mist lightly with a thermal protectant spray beforehand.
-
Run your fingers through after styling to blend the new curls into the rest of your hair.
You can also refresh limp curls by scrunching in a curl revival spray or a lightweight mousse if your hair responds well to product.
5. Avoid water-based products after styling
Spritzing your hair with water or water-heavy leave-ins after curling can cause curls to unravel or puff up. Keep moisture-focused products for pre-styling and conditioning routines. Once your curls are styled, stick to dry touch-ups and sealing sprays.
6. Hands off
We get it—it’s tempting to touch your curls all day. But the more you run your hands through them, the more oils, dirt, and friction you introduce. Try to avoid over-touching your hair throughout the day. If you need to reshape curls, flip your hair upside down and give it a gentle shake to reawaken volume.
7. Think about your starting texture
Some hair types naturally hold a curl longer, while others need more prep. If you have fine or silky hair, consider using a texturizing or volumizing spray before curling to create grip. If your hair is coarse or dry, make sure it’s deeply hydrated beforehand—dry hair tends to fry and lose shape faster under heat.

Common curling iron mistakes (and how to avoid them)
Even seasoned stylists run into issues. Here’s how to fix or avoid them:
- Your curls fall flat: You might be using too much product or too large of a section. Try smaller sections, less prep product, and make sure hair is fully dry before curling.
- You see clamp creases: That’s from clamping too close to the ends or holding too long in one spot. Glide the iron smoothly and consider switching to a wand if this keeps happening.
-
Your hair looks dry or crispy: Too much heat, too little protection. Always use a product like the Moisture Hydrate & Heat Protectant Spray before styling to preserve softness.
What to do post-styling to reduce damage
Even when you’re using a high-tech curling iron like the TYME Iron Pro, consistent heat styling takes a toll over time. That’s why your post-curl care routine is just as important as your styling technique.
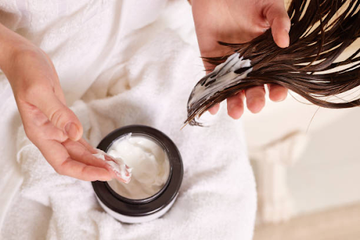
Start by committing to weekly deep conditioning treatments. Heat opens up the hair cuticle to create your style—but it also allows moisture to escape. Replenishing that lost hydration is key to maintaining softness and flexibility. Choose a mask rich in fatty acids, keratin, or amino acids to restore your hair’s strength from within. Apply it after shampooing, leave it in for 10–30 minutes (depending on the formula), and wrap your hair in a warm towel for deeper penetration.
Next, clarify. Use a clarifying shampoo every 2–3 weeks to remove product buildup from thermal sprays, texture creams, or serums. These layers can clog your hair shaft, weighing down curls and making your hair appear dull. Be sure to follow up with a hydrating conditioner so your strands don’t feel stripped.
After curling, avoid overloading your hair with products, especially alcohol-based formulas like strong-hold hairsprays or dry shampoos. These can make your strands brittle and prone to breakage. Instead, go light with nourishing serums or shine mists that contain ingredients like argan oil, grapeseed oil, or silicone alternatives to lock in style and smooth flyaways.
If you notice early signs of damage—like increased tangling, visible split ends, or breakage near the mid-shaft—give your hair a heat break. Opt for protective styles like low buns, loose braids, or claw clip twists that don’t require additional heat. Use silk or satin scrunchies to avoid friction, and consider sleeping on a satin pillowcase to reduce stress on your hair overnight.
Most importantly, treat your post-styling routine as a form of hair recovery—not just maintenance. Think of it as pressing pause to rebuild strength, smoothness, and resilience between styling days. Your hair will thank you with shine, bounce, and better hold the next time you curl.
Your curl, your way
No two curl routines are the same—and that’s what makes styling personal. Whether you’re just learning how to curl your hair with a curling iron or you’re upgrading your technique with TYME’s signature tips, the key is finding what works for your hair type, lifestyle, and texture.
With the right prep, the right barrel, and a little practice, you’ll be able to create bouncy waves, polished curls, or tousled texture in just a few minutes—and with far less effort than you thought.