How to nail that glass-hair finish without a stylist on speed dial
Some hairstyles fade out after a season, but sleek, straight hair has a permanent seat at the table. It’s a style that signals intention: glossy, refined, and quietly powerful. Zendaya’s glass-smooth part, Kim Kardashian’s reflective lengths, and Dua Lipa’s razor-cut bob each show a different take, yet all point to the same thing: hair that looks deliberate and impossibly chic.
The appeal is obvious. Sleek strands reflect the light, shift the shape of your face, and bring a certain sharpness to your overall look. Even the most low-key outfit feels elevated when the hair is this controlled. But nailing it at home isn’t always simple. Frizz creeps in, ends flick the wrong way, and humidity tests every bit of patience.
This sleek straight hair tutorial walks you through the methods stylists rely on, broken down so they’re doable in your own bathroom. With the right prep and the right technique, that polished, editorial finish is within reach (no backstage pass required).
Prep for success
A flawless finish always starts long before the flat iron. Think of prep as your insurance policy: it sets the foundation so every pass of heat styling actually delivers shine instead of fighting against frizz.
Clean, but not stripped
Start with a clarifying or lightweight shampoo that lifts away product build-up. Sleek hair depends on a smooth surface, and residue will only weigh strands down. Follow with a conditioner that hydrates without leaving behind heaviness—look for something described as “weightless moisture.”
Protect and smooth
Before you touch any hot tools, mist on a leave-in heat protectant. This shields the cuticle while creating slip, which helps the iron glide. If your hair is prone to puffiness, add an anti-frizz serum to damp lengths. Apply it sparingly, focusing on mid-shafts and ends where dryness shows first.
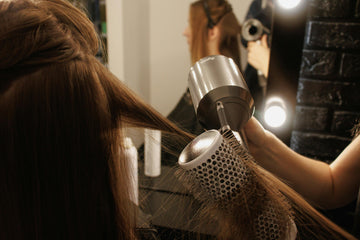
Blow-dry with intention
Letting your hair air-dry might seem easier, but it leaves too much uneven texture behind. Instead, rough-dry until about 80% dry, lifting sections away from the scalp with your fingers. This pre-styling step smooths the cuticle, preps the shape, and saves time when you move to straightening.
When it comes to how to get straight sleek hair, prep is half the battle. By the time you reach for your iron, your strands should already feel light, smooth, and halfway to the finish line.
Tools that make the look possible
Sleek hair might look effortless, but the tools you reach for make or break the result. The wrong brush or iron can leave you with kinks, frizz, or worse—uneven texture. Here’s what earns a permanent spot in the lineup.
-
A wide-tooth comb: Before any heat styling, start with a wide-tooth comb. It detangles without tugging or breaking strands, which is essential for keeping the cuticle smooth and shiny.
-
A fine-tooth comb: This is your secret weapon once you’re sectioning. Use it to part hair into clean, even slices and to guide each strand through the iron. The comb-chase method (running a comb ahead of your flat iron) is one of the simplest ways to guarantee a glassy finish.
-
Straightening brush vs. flat iron: Straightening brushes are beginner-friendly and great for taming waves quickly. They smooth and soften, but don’t usually deliver that ultra-sleek, reflective look. Flat irons, on the other hand, apply direct heat and tension, giving you precision and shine. The trade-off? They require a bit more care and technique.
- A multi-use iron: If your goal is hair that looks almost reflective, the right flat iron is key. A tool like the TYME Iron Pro is built for this finish: plates that glide smoothly, adjustable heat for different hair types, and the control to create a sharp, straight style without multiple passes.
The takeaway? Tools don’t just speed up the process, they decide whether your sleek hair reads as polished or “almost there.”
How to get sleek straight hair
Straight, glossy strands don’t just happen when you clamp a flat iron on autopilot. Achieving that runway-worthy finish is all about patience, precision, and understanding what your hair needs from root to tip. Here’s your sleek straight hair tutorial, broken down step by step.
1. Section with purpose
Start by dividing your hair into small, even sections. The cleaner your sections, the smoother your finish. Use a fine-tooth comb to create horizontal partings, clipping the top layers out of the way. Work from the nape of the neck upward so each new layer lays flat over the one before it. For shoulder-length or longer hair, aim for one-inch-wide sections; for finer or shorter hair, half-inch sections will give you the most control.
Why this is important: when you try to straighten big chunks, heat doesn’t distribute evenly. Some strands stay wavy, others overheat, and you end up chasing the same piece over and over. Smaller sections guarantee every strand is smoothed in one pass.
2. Work slowly, one section at a time
It’s tempting to rush, but sleek hair rewards patience. Clamp your iron close to the root (but not on the scalp), then glide down the section at a steady pace. Moving too fast leaves texture behind; moving too slowly risks heat damage. The sweet spot is a consistent, moderate glide that feels smooth, not jerky.
TYME tip: keep your elbow high and wrist straight so the iron glides parallel to the strand. This creates tension and prevents kinks.
3. Master the comb-chase method
This stylist trick guarantees a glass-like finish. Hold a fine-tooth comb in one hand and your flat iron in the other. Place the comb at the top of the section, then follow it immediately with the iron. The comb smooths and detangles as the iron seals, leaving behind a flawless, frizz-free strand.
TYME tip: choose a heat-resistant comb so it doesn’t warp under the iron.
4. Set the right temperature
Heat settings are not one-size-fits-all.
- Fine or fragile hair: 280–320°F
- Medium hair: 330–370°F
- Thick or coarse hair: 380–410°F
Resist the urge to crank the heat to max. Higher heat doesn’t mean better results, it just increases the risk of dryness and split ends. The goal is the lowest temperature that gets your hair sleek in a single pass.
5. Focus on tension and angle
Tension is everything. As you pull the iron through each section, keep the strand taut with your comb or free hand. This creates a smooth surface for the plates to glide across. For the ends, angle your iron slightly inward for a soft, polished look, or keep it completely straight for a sharper, editorial finish.
If your ends tend to flip out, check your wrist position: twisting or loosening tension at the bottom is usually the culprit.
6. Control frizz as you go
Frizz often shows up when hair is overworked. To prevent this:
- Pass the iron only once per section. Multiple passes rough up the cuticle instead of sealing it.
- Don’t clamp too hard; let the plates glide. Excess pressure causes lines and dents.
- Always keep the iron moving. Pausing in one spot leaves “hot marks” that are hard to smooth out.
If you notice stubborn flyaways, mist a little lightweight hairspray onto your comb and run it over the section. This tames static without weighing the style down.
7. Finish like a pro
Once every section is smooth, it’s time for the details that separate sleek hair from “straight enough.”
- Apply a pea-sized amount of lightweight serum to your palms, rub together, and smooth it over the mid-lengths and ends. This adds shine and seals cuticles without greasiness.
- Mist a shine spray lightly over the surface for that reflective, almost glass-like finish. Hold the can at least a foot away to avoid patches of product.
- If you’re prone to oiliness, skip the roots—product buildup at the scalp kills the clean look.
The result should feel smooth to the touch and look reflective from every angle. With a little patience, the right sectioning, and a steady hand, you’ll master the kind of sleek style that looks as if it came straight out of a stylist’s chair—only this time, it’s your own mirror doing the honors.
Troubleshooting common sleek hair struggles
Even with the best prep and technique, sleek styles sometimes throw curveballs. Here’s how to fix the most common snags so your strands stay polished.
Frizz and flyaways
The moment you see static or halo frizz, don’t panic. A drop of lightweight serum or a spritz of shine spray smoothed over with your palms will tame stubborn pieces without greasing up the rest of your hair. For finer strands, spray a toothbrush with hairspray and gently brush over the top layer for precision control.
Ends flipping out
Nothing ruins the effect faster than ends that won’t cooperate. If yours insist on flipping, check your angle. Keep your flat iron perfectly parallel as you reach the tips, and avoid twisting your wrist outward. For a softer finish, a slight inward tilt at the very bottom can help the hair “tuck” under neatly.
Oily scalp after straightening
Sleek styles hug the head more closely, which can make roots look oily fast. A quick mist of dry shampoo at the crown lifts everything back up. Massage it in with your fingertips to absorb excess oil and restore that freshly styled look.
Humidity-proofing
Moisture in the air can undo hours of effort. A humidity-resistant finishing spray creates an invisible barrier over the cuticle, locking in smoothness. Keep a travel-sized bottle in your bag for touch-ups on damp days.
The best straight sleek hair tutorial doesn’t just show you how to get the look, it helps you keep it intact, no matter what your hair or the weather throws at you.
Your shortcut to a polished finish
This sleek straight hair tutorial isn’t about perfection on the first try. It’s about building a method that makes your hair consistently smooth, shiny, and sharp, no matter if you’re styling for the office or a night out. Over time, those precise, polished strands become second nature.
And while practice counts, the right tool makes the biggest difference. A multi-tasking styler like the TYME Iron Pro gives you the control and precision to nail that glossy finish without endless passes or salon visits.