Everything you need to know, without the guesswork
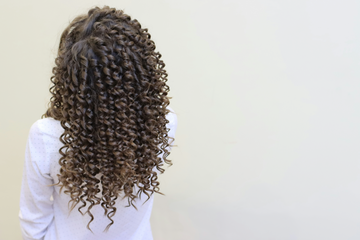
There’s something undeniably bold about a pixie cut. It’s chic. It’s freeing. It’s a beauty editor favorite for a reason. But short hair also comes with its own set of styling challenges—especially when you’re working with a flat iron. One wrong flick of the wrist and you’ve accidentally flipped your bangs the wrong way or added more frizz than polish.
If you’ve been hunting for real, no-fuss flat iron tips for pixie cuts, you’re in the right place. Whether you’re smoothing a sleek finish or adding definition to piecey layers, we’re breaking down exactly how to make your flat iron work smarter—not harder—for short hair. Let’s turn your pixie into a statement.
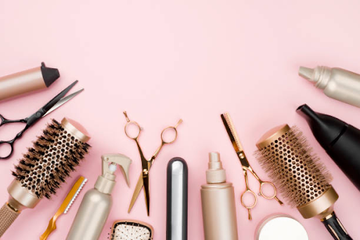
Choose the right flat iron for short hair
The first step to styling success? Your tool. When it comes to short styles like a pixie, not all flat irons are created equal.
Why plate size matters more than you think
When you’re working with inches of hair instead of layers of it, precision becomes everything. Flat irons with wide plates—like the ones designed for smoothing long, thick hair—can overwhelm a pixie. They’re harder to maneuver and can leave behind uneven bends or awkward creases.
Instead, look for a flat iron with slim plates between ½ inch and 1 inch wide. These allow for better control around delicate areas like the ears, hairline, and nape of the neck. You’ll be able to smooth sections in smaller, more deliberate passes without dragging or overheating the hair.
When to use a pencil flat iron
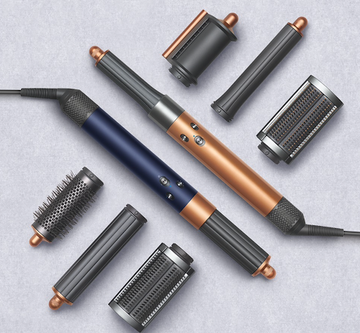
A pencil flat iron isn’t just a clever name—it’s designed to be extra narrow, making it ideal for touching up tiny sections or creating definition in cropped styles. This tool is especially helpful if your pixie cut is ultra-short or heavily textured.
Use it to:
– Flip or tame baby hairs and fringe
– Add separation to choppy layers
– Shape small curls or spikes without tugging
Because the plates are so small, pencil flat irons tend to heat quickly and stay hot. Always start on a lower setting and work your way up to avoid singeing ends.
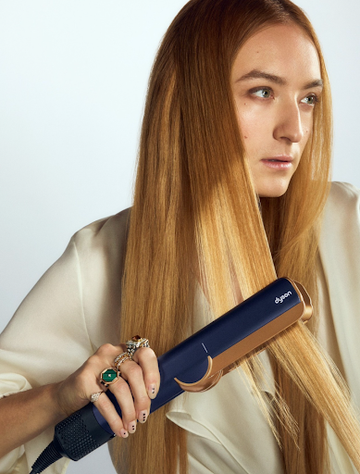
What makes the TYME Iron different
TYME’s signature iron is known for creating curls and waves with a twist of the wrist, but it’s also quietly brilliant for short hair when used with the right technique. The titanium plates distribute heat evenly, and the angled shape gives you the freedom to lift the roots, smooth out sides, or bend the ends under in a single pass.
For pixie cuts with more volume on top or layered length through the crown, the TYME Iron can help shape those areas quickly without needing a second tool. Its design allows you to “curl and pull” in one motion, making it easier to control styling direction while preserving texture.
How to choose based on your pixie style
Not every pixie is cut the same way—and your flat iron choice should reflect your style.
– Long pixies with side-swept bangs: Go for a 1-inch flat iron with beveled edges. This gives you more styling versatility while still being compact enough to move through shorter layers.
– Short, edgy pixies or undercuts: A pencil flat iron is your secret weapon for precision and detail.
– Textured pixies with volume at the top: TYME’s angled iron works well here to build lift and shape without sacrificing shine.
Prep is everything
Styling short hair with a flat iron might seem quick, but the foundation you lay before heat even touches your strands makes all the difference. A few intentional steps can take your pixie from flat and fuzzy to smooth and sculpted—with better hold and less damage.
Start with clean, dry hair—but not too clean
Freshly washed hair can be slippery, especially if you’ve used a lot of conditioner. If your hair is ultra-fine or doesn’t hold heat styles easily, second-day hair might be your best friend. The natural oils help give the style grip without looking greasy.
For thicker or textured pixie cuts, a lightweight leave-in conditioner or styling cream can help balance moisture while protecting against frizz.
Don’t skip heat protectant
This step isn’t just for long hair. Short strands may be closer to the root, but they’re still vulnerable to heat damage—sometimes even more so, since they’re exposed to more direct heat in smaller sections.
Use a lightweight spray or serum that won’t weigh the hair down. Focus on misting the crown, sides, and fringe, then comb it through to distribute evenly. Let the product dry completely before touching your flat iron to your hair. If it’s still damp, you risk sizzling the strands.
Create your part before styling
Flat ironing locks your shape in place, which is great—unless you’ve parted your hair too far over and end up committed to the wrong side.
Take a moment to section your hair the way you actually want to wear it. That could mean a deep side part for volume, a center part for symmetry, or a tousled, undefined look if you prefer a messier finish. Whatever your vibe, setting it first will help you guide the heat in the right direction for that final look.
Consider adding a primer or volumizer
If your pixie tends to fall flat, a styling primer or root-lifting spray can add a bit of structure without making the hair stiff. Look for products labeled as “thermal primers” or “blow-dry extenders”—many of them double as heat protectants, giving you a boost in hold and shape memory.
A quick mist at the roots, followed by a finger tousle, is usually all you need.
Section intentionally
You might think sectioning doesn’t apply to pixie cuts, but even short hair benefits from structure during styling. Creating small, intentional sections gives you more control over your shape and helps prevent unwanted bends or frizz.
Why sectioning matters for short styles
When you try to flat iron your entire head at once—or just grab random pieces—you’re more likely to miss spots or apply uneven heat. That’s how dents, cowlicks, or flattened crown areas happen. Breaking your pixie into manageable sections helps you stay consistent and shape each layer with intention.
It also helps you move efficiently, especially if you're working with a mix of textures, cowlicks, or newer growth near the neckline.
How to section a pixie cut
Start by visualizing your hair in three key zones:
– Crown/top: This area adds volume and sets the silhouette of your pixie.
– Sides and fringe: These areas frame your face and need precision.
– Back and nape: Often overlooked, but key for a clean, finished look.
Use your fingers or a tail comb to gently separate each zone. You can clip up the top if needed, or simply push it out of the way while you focus on the sides and back first.
Even if your hair is too short for full clips, tucking small sections aside can help you focus one area at a time.
Where to start
If you’re aiming for volume, start at the crown and work your way down. This lets you lift the roots before setting the shape of the top layer.
If you’re going for a sleeker look, start at the nape of the neck and move upward. That way, each section lays cleanly on top of the last, creating a smooth, sculpted effect.
There’s no strict rule—choose the order that fits your cut and your goals.
Keep your passes clean
Flat iron one small section at a time, keeping your wrist steady and your pace even. If you rush, you might have to go over the same spot twice, which increases the chance of heat damage. If your flat iron has floating plates or beveled edges, use them to your advantage by gliding gently instead of clamping too hard.
Flat iron technique tips for pixie cuts
Once you’ve prepped your hair and created clean sections, it’s time to bring your pixie cut to life. Whether you’re aiming for sleek and sculpted or soft and tousled, your technique makes all the difference.
Master the glide-and-flick
For a polished finish, start near the roots, glide the flat iron down the hair shaft, and gently flick your wrist at the ends. This adds just enough shape without curling or spiking the hair. The flick can go under, out, or back depending on your desired silhouette.
This method works especially well on longer top layers or grown-out fringe. It adds curve and movement while keeping the ends controlled.
Avoid dents with consistent tension
Dents and sharp lines often come from stopping mid-pass or clamping too tightly at the root. Instead, apply gentle, even tension as you move through each section. A slow, controlled glide gives you smoother results with fewer touch-ups.
If your flat iron has beveled edges or floating plates, use them to curve the ends softly as you go. This mimics a natural bend and prevents harsh creases.
Use the pencil flat iron for detail work
For those tiny sections near your ears or at the nape of your neck, a pencil flat iron offers better control. It’s also ideal for styling choppy pieces or short bangs, where a larger tool might be too bulky.
Use it to:
– Flip out fringe for a playful look
– Tuck shorter pieces inward for a neater finish
– Add texture to the crown by lifting and lightly bending select strands
This tool gives you flexibility without forcing every section into the same shape.
Don’t forget the direction of heat
If you’re going for volume, pull your flat iron upward from the root, then release. For a sleeker look, angle the tool downward, especially on the sides and back. The way you apply heat influences how the hair lays—so treat each section like a mini sculpture.
Refine the fringe
Your bangs or front pieces are often the focal point of a pixie cut. Use a light hand here. Too much heat can make them look stiff or overly curved.
Instead, try this:
– Clamp near the base
– Glide forward at a slight diagonal
– Curve slightly under or out, depending on your style
Let the fringe cool in place before touching it; this can help it hold its shape without extra product.
Your pixie, styled with precision
Styling a pixie cut with a flat iron is less about following strict rules and more about learning what works for your hair. With the right prep, sectioning, and a few small adjustments in angle and tension, your flat iron becomes more than just a heat tool—it becomes the key to creating shape, lift, or smoothness exactly where you want it.
Whether you’re mastering your TYME Iron, reaching for a pencil flat iron, or refining your everyday routine, you now have the tools and techniques to make short hair feel effortless. Keep practicing, stay intentional, and let your pixie cut reflect your personal style—every pass of the iron is a chance to define