For the right side, pick the iron up with your left thumb behind the power button. Place the guidelines, (or Guide Side on the Pro version of the Iron), close to your scalp. Lean the tip of the iron forward and rotate the guidelines away from your head toward the mirror.

Again, starting by placing your hair between the guidelines, left thumb behind the power light, rotate the guidelines (or curved side) toward mirror, making sure to lean the tip of the iron toward the mirror. This time, I used my right hand to hold the hair that is hanging behind the iron. This allows me to make sure the hair doesn’t drop down into the iron and fall off the heating plates.

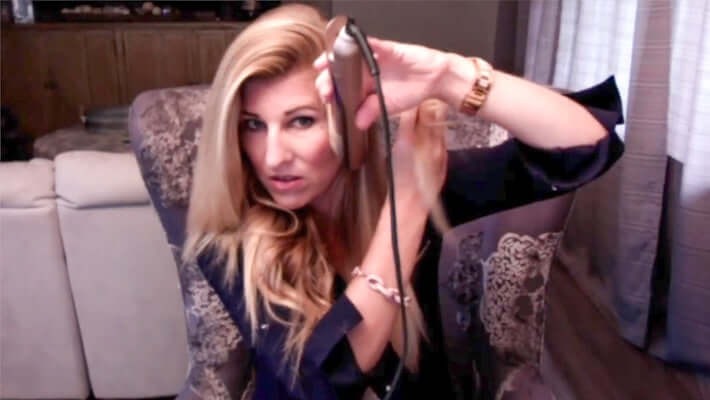
Switching to the lower left side, I move all of the top section of hair over to the other side. This is an easy way to section without sectioning. Watch how I switch my grip to curl the left side. I place my left thumb under the T in TYME, (or on the temperature lights for the TYME Pro version), and my left pointer finger behind the power light. Pay close attention to how the iron points back over my shoulder with the guide side close to your head.
On the left side, always make sure you start by entering the section from the top and the curl up. This will create curl going away from your face on the left side. Rotate the guide side toward the mirror and glide, making sure to stay very close to your head as you glide forward.

I also noticed that holding the iron with my three fingers on the button side and my pinky and thumb on the other side give me more control and rotation, hence the funny face when I realized I was doing that.
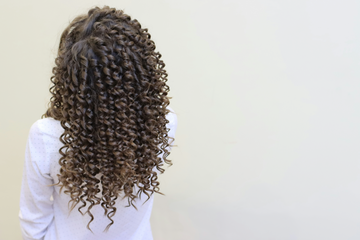
Now that you’ve curled the lower section, you can part your hair how you want it for the final look.

To curl towards your face on the left, you will switch your grip to have your thumb behind the power light. This time, keep your cord down and come in from under the section with the guidelines close to your scalp, and rotate from the back to the front.
When you are further back on the head, make sure you keep the iron close to your head and the iron is more vertical. It’s really rotated, so I will end up with a more curly curl, but I leave the end out, so it will still have a beachy look. If you want a curly curl, just glide through to the ends.
Finishing touches. The goal is to create volume without losing definition. So, I plump the hair and I also define curls. If you have any questions or comments, leave them below. Thanks for watching.
Please Note: We will be recreating this video and the step-by-step instructions early 2019. Please be sure to sign up for our email, or to check back soon for the updated video and instructions!
For more tips and hair tutorials, follow us on Facebook, Instagram, YouTube, and Pinterest