Read time: 2 min 30 sec
Since most of our users are making the leap from flat irons and curling irons, nailing down the motions of the TYME Iron is vital to the experience and end result. Here are a few easy adjustments that we’ve compiled from our TYME Style sessions with newbies!
Getting Prepped to Style
We always recommend curling on freshly washed and dried hair. Your foundational products are the key to healthy, hydrated hair. Using a nourishing shampoo and conditioner like Power Couple will lock in moisture, prevent damage from heat tools, and hold your style longer. Make sure to apply a thermal protectant, like UPSTAGED, before you begin heat styling.
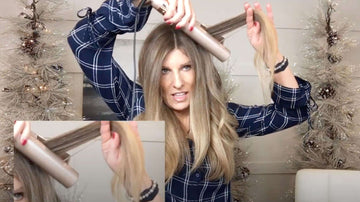
How are you sectioning your hair?
Our recommendation is to leave all your hair down! Start styling your hair by taking vertical sections and moving back to front. Brush through each section before curling. You’ll want the hair flat like a sheet of paper so the iron glides through smoothly and evenly heats the hair.
Always hold the TYME Iron with your thumb behind the power button. Always! This is the only way you will get the curls you want! Also, pay attention to your heat settings. Although it may take a couple of trial-runs to find what temperature works best for your hair type and texture, having your heat too high or too low can make a HUGE difference.
While You’re Curling
Soften your grip!
Make sure there is a slight gap between the plates of the iron as you glide through the hair! This is a fool-proof way to know that you are not applying too much pressure and damaging your hair. Also, when you squeeze the iron with too much tension, you’re more prone to creating creases in your curls.
Are you giving each curl the time it deserves?
If you push your iron through a section too quickly, you won’t properly heat the hair which means it won’t get styled. This method can also create quite a bit of frizz! Test out how many seconds it takes to get your ideal curl. Depending on the length of your hair it could take anywhere from three seconds to ten.
Keep your hair in between the plates!
Once you have your hair placed between the heated plates, help make sure your hair stays in place! Grab the end of your section to prevent it from sliding off of the plates.
Pro Tip: Always make sure you are pushing the iron forward when you curl! When you push the hair back or directly out, you are counteracting the rotation in your wrist.
Finishing Your Look!
“Where hair cools, is where it stays!”
Say that again. Remember to twist your hair back after curling it. Right after you curl a section it is still warm enough to be manipulated. Using your index finger, twist your fresh curl away from your face to set in the shape you want and let it cool. We recommend only gliding through each section once so you are not overly applying heat and damaging your hair. If you have a curl that is a completely lost cause, wait until the very end of your styling session for it to cool before re-curling it. You may also realize you don’t need to re-curl that piece once your whole style comes together!
Match your right side to your left!
If you rotate your wrist significantly on the left side, make sure you are using the same wrist rotation on the right side. Keeping your elbow and forearm at the same angle on both sides will ensure you are creating matching curls.
These small adjustments should help you create your ideal style!
For more tips and hair tutorials, follow us on Facebook, Instagram, YouTube, and Pinterest.


