Blog
Blog
The easy “salon” blowout-with-a-straightener tutorial
Master TikTok’s #fakeblowout trend to save $$$
If you’ve ever tried giving yourself a classic round-brush blowout at home, you already know it’s one of those things that looks simple until you’re actually doing it. The brush slips, the dryer angle feels wrong, your wrist starts negotiating its exit, and suddenly the whole thing becomes a bit… ambitious. Most of us don’t want a full-arm workout before 9 a.m.; we just want smooth, bouncy hair that looks intentional.That’s where the blowout with a straightener steps in. TikTok has basically turned it into a movement, and honestly, it makes sense: it’s a much more practical way to get that lifted, glossy finish without the brush-balancing circus act. A straightener gives you control—you can smooth where you need smooth, add movement where you want movement, and shape the ends without fighting gravity, airflow, or beginner-level coordination.Once you understand the basic flick-and-glide technique, it becomes one of those styling habits you start doing on autopilot because it’s quick and genuinely easy. So if you’ve been wondering how to do a blowout with a straightener all this time, you’re in the right place.
Why a straightener blowout just ✨works✨
A straightener isn’t the first tool most people imagine when they think “blowout,” but it’s secretly one of the most effective ways to get that smooth, lifted, salon-fresh finish at home. Traditional blowouts usually require coordinating a round brush, a dryer, and sheer willpower; a straightener simplifies the whole process by smoothing and shaping in a single movement. The science is simple: a straightener applies controlled, even heat from both sides of the hair, which means you can sculpt bends, flips, and volume more precisely than you can with a dryer. It’s why the results often look more polished and reflective—the plates seal the cuticle as you work, giving you that pro-level shine. It’s also a technique that works on a wide range of hair types. If your hair is naturally straight, it adds shape and bounce. If your hair is wavy or mildly frizzy, it smooths while maintaining movement. If your hair is curly, it gives you the option of a sleeker, round-brush-style finish without actually needing the brush.The real win? Control. You decide where you want volume, how soft or dramatic the ends should be, and how much bend feels right for you. Once you learn the basic flick-and-glide motion, a straightener blowout becomes one of the easiest, most reliable ways to style your hair without the complexity of a classic blow-dry.Source: ELLE
Gather your blowout supplies
A great blowout doesn’t start with the straightener; it starts with what you do before the plates ever touch your hair. Prepping properly makes the difference between a smooth, bouncy finish and a style that falls flat (or frizzes) the second you walk out the door. Here’s what you’ll want on standby.
A straightener with rounded edges
You can technically use any flat iron, but rounded or curved edges make a HUGE difference. They let you bend and bevel the hair without creating sharp creases. A 1" or 1.25" plate is the easiest to control for most hair lengths. As always, we’d recommend the TYME Iron Pro for its versatility.
Heat protectant
Non-negotiable. A mist, cream, or serum formula will protect your strands while helping the straightener glide more smoothly. Apply evenly from mid-lengths to ends and brush it through so everything is coated.
A detangling brush or wide-tooth comb
Knots are the enemy of smooth styling. Start with completely detangled hair; it’ll help the straightener move fluidly and reduce tugging.
Sectioning clips
Your blowout will look more structured when you work in layers. Clips help keep everything separated and let you focus on one section at a time without feeling rushed.
Optional but helpful:
A lightweight mousse or root-lifting spray for volume
A smoothing cream for frizz control
Dry shampoo if your roots tend to fall flat
A flexible-hold hairspray or shine spray for the final step
Prepping takes only a few minutes, but it sets the tone for the entire blowout—and makes the styling process far faster and more predictable.
How to do a DIY blowout with a straightener
Step 1: Start with clean, dry, fully prepped hair
Before you even turn on your straightener, make sure your hair is clean, dry, and evenly coated in heat protectant. The smoother your starting point, the smoother the result. If your roots tend to fall flat, work in a small amount of mousse or a root-lifting spray while your hair is damp. Once everything’s dry, brush it through so you’re starting with tangle-free hair that your straightener can glide over without catching or dragging. This is the “foundation” step that sets you up for that polished, salon-style finish.
Step 2: Section your hair so you’re only working with one layer at a time
Even if you’re tempted to skip it, sectioning makes the entire process easier and way more consistent. Clip the top and middle layers of your hair out of the way and start with the bottom layer. Working in smaller, controlled sections gives you more precision and prevents that uneven “puffy underneath, sleek on top” situation that often happens when you rush through a blowout.
Step 3: Smooth the strand first, then add the bend
For each section, start by running the straightener down the hair once just to smooth everything out. Then, on the second pass, add your bend: clamp near the root, rotate your wrist slightly inward or outward (depending on whether you want a flick or a swoop), and gently glide down the length. This two-pass method gives you a cleaner result because you’re not trying to straighten and shape at the same time. It’s a small detail, but it’s what makes the movement feel easy rather than fussy.
Step 4: Use the “long glide” technique for volume and bounce
To create that signature blowout lift, angle the straightener slightly upward as you move from the root to the mid-lengths, then soften the angle as you reach the ends. This upward glide builds volume without teasing or product overload—it simply encourages the hair to lift away from the scalp in the same way a round brush would. If you want a more dramatic bend, rotate your wrist an extra quarter turn as you move through the mid-lengths.
Step 5: Shape the ends for that salon-style finish
The ends are what make the straightener blowout look intentional instead of accidental. For that polished, bouncy look, turn the straightener gently inward or outward for the last two inches of the hair. If you prefer a more modern, minimal finish, leave the ends straighter with just a soft bevel. The key is to keep the movement fluid—no sharp turns or stops at the bottom. The smoother the motion, the smoother the result.
Step 6: Repeat through each layer, adjusting your bend as you go
As you release each section, move upward through your layers, using the same smooth-pass-then-shape technique. For the top layer, raise the section slightly off the head before gliding the straightener through—this adds lift where most people want volume the most. Alternate the direction of your bends for a more natural, “yes, my hair just does this” look, or keep everything uniform for a classic blowout shape. Both work beautifully; it’s about the vibe you’re going for.
Step 7: Give your face-framing pieces extra attention
These pieces set the tone for the entire style, so take an extra moment here. Glide the straightener through the front sections while sweeping them away from your face to create that effortless, curtain-like movement. If you have shorter layers or curtain bangs, use a quicker glide and a softer bend; they need less heat to hold their shape and look best with subtle movement.
Step 8: Let your hair cool before touching it
Once everything is shaped, resist the urge to immediately rake your hands through it. Cooling is what locks the style in, just like in a traditional blowout. Give it a minute or two while you tidy your counter, check your phone, drink water—anything but touching your curls. Once cool, shake out the roots with your fingers or brush through lightly depending on how polished or undone you want the final look to be.
Step 9: Finish with the right products (nothing too heavy)
To keep the blowout airy and bouncy, use lightweight finishing products. A flexible-hold hairspray will maintain movement without stiffness. A tiny amount of smoothing serum or shine spray can add gloss, but keep it minimal so the hair doesn’t lose lift. If you want extra longevity, mist a little dry shampoo at the roots after the hair cools—it helps maintain volume without building residue.
Source: Instagram
Styling tweaks & variations
One of the best parts about doing a blowout with a straightener is how easy it is to customize the final look. The same technique can give you sleek ends one day, soft bends the next, or full “big hair energy” when you’re in the mood for it. If you want something classic and polished, keep your bends consistent and brush everything together once it cools—this creates that smooth, uniform shape that says “I have my life together today.” For something more relaxed, alternate the direction of your bends as you work through the layers. It breaks up the pattern just enough to give that effortless, slightly lived-in feel without crossing into messy.If extra volume is the goal, focus on lifting at the roots during your glide and don’t be afraid to use bigger sections toward the top. And if your ends tend to flip wildly in their own direction (relatable), give them an intentional bevel with a slow, gentle curve. You can even add a subtle wave mid-length by rotating the straightener an extra quarter turn—just enough to break up the straight line.
Making your blowout with a straightener last
A great blowout doesn’t need to disappear the moment you go to bed. With a few small habits, you can stretch your straightener blowout into two, three, sometimes even four good hair days. The trick is to protect the shape you created while avoiding anything that weighs the hair down.Start with sleep: a silk or satin pillowcase is the easiest insurance policy you can buy. It reduces friction so your ends don’t frizz and your bend doesn’t flatten overnight. If you want extra staying power, loosely clip your hair in a “pin curl” shape at the crown or twist it into a very soft, loose bun secured with a silk scrunchie. Tight elastics are the enemy here—they create kinks that no one asked for.On day two and beyond, dry shampoo becomes your best friend. Apply it before you need it, tapping it into the roots to keep volume lifted. If your lengths start looking a little tired, a quick, low-heat glide with the straightener can revive shape without restyling from scratch. And if frizz creeps in, a tiny amount of lightweight serum will smooth things out without collapsing your bounce.
Smooth, bouncy, done—that’s the straightener advantage
A straightener blowout is one of those techniques that feels almost too simple once you get the hang of it. A flick here, a bend there, a slow glide through the ends—and suddenly your hair looks intentionally styled, even if you only spent a few minutes on it. The real beauty of this method is that it adapts to however you like your hair to look: polished, bouncy, understated, or somewhere in the middle. It’s flexible, predictable, and surprisingly forgiving.And now that you know how to do a blowout with a straightener—proper prep, the right angles, cooling time, and the lightweight finishing touches—you’ve basically unlocked a salon result using the tool you already own. No round brush choreography required.So try the steps, tweak the finish, experiment with the volume, and let this become the styling hack you reach for whenever you want that good hair day confidence. Your blowout era officially begins now.
A pro flat iron curls tutorial for medium hair
Your guide to soft waves, smooth curls, and lived-in texture
If you’ve ever watched someone curl their hair with a flat iron and thought, “Okay, but how is their wrist doing that?” — welcome, you’re among friends. Curling with a flat iron looks weirdly advanced until you actually understand what’s happening. One slight turn in the wrong direction and suddenly you’ve created either a mysterious dent or a curl so tight it feels like it’s from a different decade.But here’s the good news: once you get the technique down, a flat iron curls tutorial becomes life-changing—even more so for medium hair. Medium lengths have the perfect amount of weight for soft bends, the ideal surface for polished curls, and the flexibility to hold style without falling flat. It’s basically the sweet spot for curling with a flat iron if you know how to handle the angles and tension.This is the curling hair with flat iron tutorial that finally breaks it all down in a way that feels doable — even if you’ve never curled a single strand with anything other than a curling iron. And by the end, you’ll be able to create multiple types of curls: relaxed waves, S-bends, ribbon curls, lived-in texture, and full glam spirals.
Why use a flat iron to curl medium hair?
Medium hair is secretly the MVP length for flat-iron curls. Here’s why:
1. It’s long enough to wrap and flip, without getting tangled. Short hair doesn’t always have enough length for a full rotation, and long hair can be heavy and awkward. Medium hair hits the technical sweet spot.2. Curls hold longer. Because medium hair isn’t weighed down by length, curls last longer — especially when using a flat iron, which seals the shape more efficiently than a wand.3. You get more styles out of one tool. A flat iron can create:
soft waves
tight curls
beachy texture
S-bends
flicked ends
glam ribbon curls(Curling irons can’t do half of that!)
4. It smooths as it curls. Flat irons press and heat simultaneously, leaving curls shiny, sleek, and polished.5. It’s quicker than you think. Once you get the movement down, a full curl hair tutorial with flat iron can take less than 10 minutes.Now that you’re convinced, let’s prep.
Tools, prep & heat settings for medium hair
Good curls start before the flat iron even turns on.
Choose the right flat iron
For medium hair, the best flat iron for curls has:
1" plates (perfect for wrapping and rotating)
Rounded edges (no sharp corners that cause dents)
Floating plates (move with your hair instead of clamping harshly)
Heat settings
Fine to medium hair: 300–330°F
Medium to thick hair: 330–365°F
Coarse or hard-to-curl hair: 370–400°F
Go lower if your hair is color-treated or fragile.
Product prep
Heat protectant (non-negotiable)
Light styling cream or mousse to help grip
Dry shampoo if roots are slippery
Flexible-hold hairspray for later — don’t apply yet
Sectioning
Even sections = even curls. Aim for:
1" sections for defined curls
1.5–2" for softer waves
FYI: Medium hair responds best when section sizes stay consistent.
Your flat iron curls tutorial (step-by-step)
This flat iron curls tutorial for medium hair uses a simple flip-and-glide technique—no wild wrist acrobatics needed.
STEP 1
Start with the front sections instead of the back—it makes the whole process easier, especially for medium hair. Take a one-inch piece around your face, place the flat iron near the root, clamp gently, and rotate the iron 180 degrees away from your face. This helps you get comfortable with the movement before you work your way around the rest of your head. Think of it as your “warm-up curl”: it sets the direction, defines the overall look, and gives you a quick visual cue for whether you want tighter curls, looser bends, or something in between.
STEP 2
Once the iron is rotated, slowly glide it down the length of your hair. The curl forms from the initial twist, not from twisting the iron the whole way down, so don’t overthink the movement. A slow glide gives you a tighter curl, and a faster glide creates a softer wave.Keeping the pressure light and the motion continuous is key; stopping mid-glide is the easiest way to create dents. As long as your iron keeps moving, the curl will look smooth and intentional.
STEP 3
To customize your curls, adjust the rotation and gliding speed based on the style you want. For classic curls, rotate the iron fully and glide at a steady, slower pace. For loose waves, rotate only halfway and move faster. For beachy texture, use a soft “twist and flatten” motion as you glide to create that lived-in S-shape. To get sculpted ribbon curls, keep consistent tension as you pull through. And for a more modern look, start at mid-length and leave the ends out. With medium hair, these variations look especially good because the length hits in all the right places to show off curl definition.
STEP 4
Continue curling the rest of your hair in small, manageable sections, working from the top layers down. Medium hair typically needs one-inch sections through most of the head, slightly larger pieces on the top for softness, and smaller ones underneath for structure.Alternating directions—one away from your face, one toward your face—keeps the curls from merging into one big wave and adds natural movement. By the time you reach the back, the technique feels much more intuitive, and your curls will naturally fall into a balanced pattern.
STEP 5
Once everything is curled, resist the urge to touch, comb, or shake anything out. Letting curls cool is the single most important step for making them last, especially on medium hair that can loosen throughout the day. Cooling locks the shape into place, so give your curls two to three minutes to fully set. You can clip them up if you want extra longevity, but even just letting them fall untouched makes a huge difference in how well they hold.
STEP 6
When your curls are cool, go in with your chosen styling finish. For smooth, polished curls, use a wide-tooth comb or your fingers to softly break them apart. For fluffy, voluminous movement, shake out the roots only and leave the lengths intact. For beachy texture, twist random strands with your fingers and mist on a little texture spray. Finish with flexible-hold hairspray so everything stays touchable but secure. This final step is where your curl personality shows up—soft, structured, undone, glossy, whatever you’re into.
Different curl styles you can create with a flat iron
Source: Chloe Swift StylistMedium hair is the perfect test canvas because curls hold shape without collapsing. Below are style options and how to get them using the same basic flat iron technique.
Loose everyday waves
Perfect for work, brunch, dates, or the days you want to appear “effortlessly styled.” How to get them:
Rotate 90°
Glide quickly
Leave ends slightly out
Comb through after cooling
Why it works on medium hair: The length sits beautifully at the collarbone or shoulder, creating movement that looks intentional but not overdone.
Modern beach waves
This is the “cool girl” wave that’s casual, textured, undone but not frizzy. How to do it:
Use the S-bend technique
Add texture spray
Fluff with fingertips
Why it works on medium hair: Medium hair is ideal for this because the waves hit at the perfect place to frame the face without overwhelming your length.
Glam ribbon curls
Great for events or when you want high shine and structured shape. How to do it:
Rotate the iron a full 180°
Maintain consistent tension
Glide slowly for maximum definition
Why it works on medium hair: Medium hair creates bouncy, uniform curls that sit beautifully on the shoulders.
Voluminous curls with lift
Ideal for flat roots or fine-to-medium hair types. How to get volume:
Curl the top layer horizontally
Curl bottom layers vertically
Shake out from the roots only
Why it works on medium hair: Medium hair is easier to lift because the weight is balanced—not too long, not too short.
Troubleshooting flat iron curls on medium hair
Even with a solid curl hair tutorial with flat iron, a few things can trip you up. Here are some of the things our clients say in the salon about their curling woes:💬 “My curls separate into weird chunks.”
Your sections are too big or uneven. Solution: Stick to 1" sections for most of your head.💬 “I’m getting random dents.”
This usually means:
You're gripping too tightly
You're pausing mid-glide
Solution: Light pressure + smooth, continuous motion.💬 “My curls fall out fast.”
Common causes:
No product prep
Iron not hot enough
Pulling too fast
Solution: Increase heat slightly, slow your glide, and don’t skip mousse or light styling cream.💬 “One side looks great, the other looks… different.”
Welcome to the universal struggle.Solution: Turn your wrist in the same direction each time—imagine you’re turning a doorknob. Consistency > perfection.💬“The ends look dry.”
Medium hair can have fragile ends.Solution: Leave the last ½–1" uncurled and add a tiny drop of serum.💬 “The curls look too tight.”
Speed up your glide or rotate the iron only 90° instead of 180°.
How to make flat iron curls last longer on medium hair
Medium hair already has good curl retention, but here’s how to stretch your style even further:
Curl on day-two or day-three hair for better grip
Use a light mousse before blow drying
Pin curls while they cool for extra longevity
Sleep with hair in a loose silk scrunchie bun
Refresh in the morning with a mini flat iron wave touch-up
Curls last longest when the hair cools in the curled shape, so avoid combing until completely cool.
Recommended tools (optional but helpful)
You don’t need fancy tools for this flat iron curls tutorial, but if you want results that look smoother and more consistent, here’s what helps:
1" ceramic or titanium flat iron with rounded edges
Heat protectant (spray or cream)
Wide-tooth comb
Light mousse or styling cream
Texturizing spray
Flexible-hold hairspray
These products help medium hair hold shape without weighing it down.
Flat iron curls are easier than they look (we promise)
By this point, you’ve learned the basics, the techniques, the troubleshooting, and every trick in the book for getting medium hair to curl beautifully with a flat iron. The best part? Once you master the single rotation + smooth glide move, curling becomes second nature.Medium hair is truly one of the easiest lengths to style—it’s lightweight enough to hold shape, long enough to create movement, and versatile enough to pull off every look from effortless waves to glam curls.This flat iron curls tutorial is your starting point, but the more you play with angles, tension, and speed, the more you’ll discover your signature curl style. So grab your flat iron (we’d obviously suggest the TYME Iron Pro), practice a few sections, and enjoy entering your “I actually know how to curl my hair” era.
10 easy curling iron techniques for beginners
Curling basics for smoother, quicker styling
If you’ve ever picked up a curling iron and immediately thought “Wait… how do people make this look easy?”—welcome, you’re in the right place. Curling your hair isn’t rocket science, but it definitely feels like it the first few times you try. One wrong wrist flick and suddenly you’re left with a curl that looks suspiciously like a question mark. Cute, but not the goal.The good news is: you don’t need celebrity-level technique (or wrist strength) to get curls that look smooth, intentional, and actually last past lunchtime. What you do need are a few beginner-friendly curling iron techniques that take out the guesswork—the angles, the directions, the weird clamp dents, all of it.Let’s make curling feel like something you can actually enjoy (not endure!).
10 easy curling iron techniques
Curling wand at the ready—try these different curling techniques!
Technique 1: Classic clamp curls
If you’ve ever watched someone curl their hair with a clamp and thought it looks a little too technical for your liking, this is the one to start with. Clamp curls are the foundation of pretty much every styling method. They teach you how to control the curl pattern, how to manage the clamp without creasing your hair, and how to make each curl look roughly the same (a true win for beginners).Use a 1" or 1.25" curling iron and set your heat to low–medium—around 300–330°F if your hair is fine, 340–370°F if it’s medium or thick.Start by opening the clamp and placing the ends of your hair between the plates. Slowly roll upward toward the root, pausing for a few seconds at each turn. Release gently—and whatever you do, don’t pull downward; let it fall naturally.Pro tip: Curl everything away from your face for the most flattering shape.Mistake to avoid: Clamping too hard. Light pressure = no clamp dents.
Technique 2: Wrap-around wand curls
This technique is basically the easiest method. You don’t use the clamp at all—just wrap your hair around the barrel like a ribbon. It creates relaxed, modern curls with plenty of softness and zero stiffness.A wand or clamp iron used as a wand works. Choose a 1–1.25" barrel, and stick to medium heat.Take a small section, hold the iron vertically, and wrap the hair away from your face from root to tip. Leave a little space between each wrap if you want looser waves. Hold for 5–7 seconds, release gently, and let it cool untouched.Pro tip: Keep your ends slightly out for a more “undone but intentional” finish.
Mistake to avoid: Overwrapping. If you layer the hair on itself, the curl gets tight and uneven.
Technique 3: Flat-wrap curls (ribbon curls)
Flat-wrap curls look expensive. That’s because the hair is wrapped flat against the barrel, creating a smooth, shiny curl with zero twisting involved. Think: polished, glam, red-carpet energy.Use a 1–1.25" wand or clamp iron. Medium heat is enough, because flat-wrapping gives plenty of definition.Take a section of hair and smooth it with your fingers so it lies completely flat. Wrap it around the barrel in a ribbon shape—no twisting, no rope effect. Hold for 8–10 seconds, then gently release.Pro tip: Use a small amount of smoothing serum before curling for extra shine.
Mistake to avoid: Twisting the section. One twist = a totally different curl pattern.
Technique 4: Spiral curls
If you want curls with bounce, spring, and personality, spiral curls are your new best friend. The trick is wrapping your hair in a spiralized twist that creates a tight, defined pattern from root to end.A 3/4"–1" barrel works best. Use medium–high heat if you have thick or textured hair.Take a small section and twist it gently from the top to the ends. While it’s still twisted, wrap the entire section around the barrel. Hold for 7–10 seconds and release carefully—don’t brush or separate until it’s cool.Pro tip: Separate the curls with your fingers once they cool for maximum volume.
Mistake to avoid: Using big sections. Spiral curls only work with small, even pieces.
Technique 5: Beach waves with the curl-and-pull technique
Beach waves are everyone’s go-to because they look relaxed without sliding into messy. The curl-and-pull method delivers that soft, airy texture with almost no effort—and it’s great for beginners who want something fast.Use a 1–1.25" curling iron or wand. Heat can stay low–medium.Curl a section of hair normally, then gently pull the curl downward while it’s still warm. This stretches it slightly, turning a traditional curl into a loose, beachy wave. Continue around your head, keeping the iron angled diagonally.Pro tip: Alternate section sizes for a more natural, tousled look.
Mistake to avoid: Pulling too hard—you’re softening the curl, not straightening it.
Technique 6: Twist-wrap waves
Twist-wrap waves are the perfect mix of relaxed and defined. They create a rope-like curl that looks effortless and works especially well for layered or fine hair that struggles to hold a shape.Use a 1" wand or clamp iron used as a wand. Medium heat is ideal.Take a section and twist it once or twice, then wrap the twisted hair around the barrel. This creates a soft, dimensional curl. Hold for 7–8 seconds, release, and let cool.Pro tip: Comb through the finished curls with a wide-tooth comb for the most natural finish.
Mistake to avoid: Over-twisting. Too many twists = piecey, uneven curls.
Technique 7: The vertical curl method
Vertical curls give you that airy, face-framing movement that makes your hair look naturally styled with way less effort than it appears. It adds dimension and flow, especially around the front.Use a 1–1.25" curling iron. Medium heat works for most hair types.Hold your iron vertically (straight up and down). Wrap each section away from your face, making sure you keep the hair evenly spaced on the barrel. Hold for 5–8 seconds, release, and let it cool undisturbed.Pro tip: Use slightly smaller sections around the face for that soft, flattering contour.
Mistake to avoid: Holding the iron horizontally, as this gives a completely different effect.
Technique 8: The horizontal curl method
Horizontal curls are all about volume. If you want that plush, full-bodied look at the root, this is the technique to reach for.Use a 2” curling iron. Medium–high heat for thicker hair, medium for fine hair.Hold your iron horizontally and wrap your section around the barrel from root to end. Because the iron sits flat, the curl lifts more at the root, making each piece fuller and more rounded. Hold 8–10 seconds and release.Pro tip: Use horizontal curls on the top layers only to add lift without maxing out volume everywhere.
Mistake to avoid: Taking huge sections. Big pieces = limp results.
Technique 9: Ends-out technique
For that modern, cool-girl look that feels effortless but polished, the ends-out method is a must. It keeps your ends straight while adding bend through the mid-lengths—perfect for medium and long hair.Use a 1.25" iron or wand. Medium heat is all you need.Take a section and wrap only the mid-lengths, leaving the last inch or two out. Hold for 5–7 seconds. Release, then lightly tug downward for a softer finish.Pro tip: This technique works beautifully with a texturizing spray for added grip.
Mistake to avoid: Curling too close to the ends; it ruins the whole “undone” vibe.
Technique 10: Alternating curl directions
If your curls always clump together or fall flat quickly, alternating directions will change everything. It creates natural-looking texture, movement, and longevity (no extra effort required).Use a 1"–1.25" iron at your normal heat setting.Curl one section away from your face, then curl the next toward your face. Repeat around your entire head. Keep your section size consistent, but don’t worry about perfection—this technique is meant to look lived-in.Pro tip: Use “away from the face” for the front pieces and alternate the rest.
Mistake to avoid: Mixing curl directions within the same section—alternate by piece, not on the same strand.
Tools, prep, safety & must-knows
Before you try any of the techniques, here’s the quick, helpful guide to the tools and prep steps that make curling easier. This is the stuff most tutorials skip, but it’s what actually determines whether your curls look effortless… or fall flat five minutes later.
Heat settings:
Fine or damaged hair does best around 280–320°F—high heat can collapse the curl or cause breakage. Medium hair usually curls well at 330–360°F. Thick, coarse, or hard-to-curl hair may need 370–400°F, but only with heat protectant and shorter hold times. If you hear sizzling, it’s too hot.
Sectioning:
Sectioning isn’t just about staying organized. Smaller sections heat evenly, which gives you defined curls that last longer. Bigger sections create softer waves but tend to drop faster. Aim for sections no wider than your curling iron’s barrel for consistent results.
Products:
Heat protectant is non-negotiable! Spray from mid-lengths to ends and brush through so it’s evenly distributed. A light styling cream or mousse can help give your hair a bit of grip, especially if it’s naturally silky. Finish with a flexible-hold hairspray so your curls stay touchable, not stiff.
Clamp vs. wand:
Clamp irons are great for structured curls, more control, and reducing frizz. Wands are ideal for looser, modern waves and quicker styling. If you’re a beginner, try both—you may be surprised which one feels more intuitive.
Barrel sizes:
3/4" for spirals and tight, bouncy curls
1" for classic curls and versatile styles
1.25" for looser, everyday waves
1.5" for voluminous, soft bends
2" for barely-there curves and smooth, blown-out finishes
Avoiding heat damage:
Only curl fully dry hair. Don’t hold the iron longer than 8–10 seconds, and avoid going over the same section repeatedly.
Prep:
Detangle thoroughly, apply your products evenly, and make sure your hair is completely dry. Good prep means you get a better curl memory (in other words, your curls stay in longer!).
Troubleshooting for newbies
Curling gets a lot easier once you know why things go wrong. Here’s the quick guide to the most common beginner hiccups + the fixes that actually work.
“My curls fall flat immediately.”
Your sections are probably too big, your heat too low, or you’re not letting the curl cool before touching it. Try smaller sections and hold each curl in your palm for a few seconds to set the shape. A light-hold hairspray also helps (avoid anything too heavy).
“I keep getting those weird clamp dents.”
You’re clamping too hard or starting too close to the ends. Light pressure is enough. Try starting the curl a few inches above the ends and feeding hair into the clamp gradually.
“My curls look uneven.”
Keep your section sizes consistent and make sure the hair is evenly wrapped around the barrel. If pieces overlap or twist unintentionally, the curl will reflect that.
“The ends of my hair look dry or crunchy.”
You’re probably curling right to the ends or using too much heat. Leave the last inch out for a softer finish and apply a tiny bit of serum after styling.
“My curls look too tight… not in a cute way.”
Your barrel may be too small. Size up—or stretch the curl gently while it’s still warm for a more relaxed shape.
“I burned myself… again.”
Use a heat-resistant glove, especially while learning. Also: keep the barrel pointed down when wrapping—it gives you more control.
“My curls won’t hold no matter what I do.”
Add a tiny bit of mousse or styling cream before blow-drying to give your hair grip, and make sure it’s fully dry before curling.
Your curl era starts now
If you’ve made it this far, you’re officially past the ‘curling iron confusion’ stage—and firmly in your I can actually do this era. With a few beginner-friendly techniques and a bit of practice, curling stops feeling like a high-risk experiment and starts becoming a tool you can rely on for soft waves, defined curls, or whatever mood your hair is in that day.And if you’re ready to level up your tools, TYME’s irons are a solid next step. They heat evenly, glide smoothly, and make it easier to get consistent curls without the tugging, snagging, or “why is this side better than that side?” drama. Great tools don’t replace technique, but they absolutely make learning faster (and the results prettier).
Titanium straighteners and the temperatures that protect your hair
Smarter heat starts with knowing your hair’s limits
There are two types of people in the flat-iron world. The ones who crank their titanium straightener to the highest setting because more heat must mean better results. And the ones who panic-scroll through their settings every morning, hoping for a sign from the universe about which temperature to pick. If you fall into either camp, you are far from alone.Titanium straighteners are powerful and incredibly effective, but they do not come with built-in intuition. They heat up quickly, transfer energy intensely, and respond instantly to the hair they touch, which is why figuring out the safe temperature for titanium straighteners matters more than ever. The wrong heat can cause dryness, dullnes,s and breakage long before you even realize it is happening.And in 2026, glossy hair is all anyone wants. The blowout resurgence. The silk-press-at-home trend. The era of shiny, reflective, quiet-luxury hair is here in full force. Everyone wants smoother roots, sleeker ends and hair that stays straighter for longer. But none of that happens if your heat settings are working against you instead of with you.Titanium can help you reach peak smoothness, but it needs boundaries. Your hair type, your density, your styling goals and the condition of your strands all influence what your temperature should be. What works for thick curls absolutely will not work for fine, fragile hair. What works for healthy hair will be too much for color-treated lengths. This is why guessing is never the move.This guide breaks down the exact temperature ranges you should use, what signs tell you your heat is too high, how titanium behaves differently from ceramic and how to get sleek, polished results without frying your ends in the process.
Why titanium needs its own rulebook
Titanium is the overachiever of the straightener world. It heats up fast, stays hot and transfers energy directly and efficiently. This is great for stubborn or textured hair, but it also means titanium does not give you much room to freestyle your temperature settings. One notch too high and your hair feels it immediately.Titanium plates conduct heat more intensely than ceramic or tourmaline. Instead of slowly warming the strand from the inside, titanium delivers surface heat that smooths quickly but aggressively. That is why the right temperature is important. You want the benefit of fast styling without the side effects of overexposure.And here is the part most people miss: titanium does not care about your assumptions. Thick hair is not always heat-resistant. Fine hair is not always fragile. Color-treated hair can react differently from day to day depending on moisture levels, humidity and product buildup. This is why choosing the safe temperature for titanium straighteners starts with understanding your actual hair type, not the setting you used in high school.The rulebook is simple. Titanium gives incredible results when you respect its power. Treat it like a precision tool, not a one-setting-fits-all solution, and your styling becomes smoother, faster and far healthier.
How your hair type decides your perfect temperature
Your hair texture, density, and condition all change the temperature you should use. Even the healthiest strands have limits. Here is your TYME-approved breakdown of the best temperature for straightening hair across every texture.
Fine or thin hair
Temperature range: 250–300°FFine hair heats quickly and loses moisture faster, which means the cuticle can collapse or fry if you use aggressive heat.Use this range if:
Your hair looks flat or dull after heat
Your ends split easily
You prefer soft, movement-friendly straightening
Keep sections small and passes slow but gentle. Titanium will do the work for you.
Medium or normal hair
Temperature range: 300–375°FMost people fall into this category. Medium-density hair can handle moderate heat well, as long as it’s evenly prepped.Use this range if:
Your hair holds a straight look easily
You need a balance of speed and smoothness
You want a sleek finish without the flatness
This range lets titanium work efficiently without risking dryness.
Thick or coarse hair
Temperature range: 375–410°FThick strands require more heat to reshape the cuticle, but the trick is controlled heat, not maximal heat.Use this range if:
Your hair barely responds to lower settings
You have dense curls or waves
Your strands feel firm, not delicate
Pairing this heat with a smoothing prep spray gives you a glossy, salon-level finish.
Coily or natural hair
Temperature range: 410–450°FThis is the zone for achieving a silk-press effect. Coily hair has a robust structure that can handle higher heat when properly prepped.Use this range if:
You wear natural curls and only straighten occasionally
You want a long-lasting, humidity-resistant finish
Your strands are healthy and hydrated
Always make sure the hair is fully dry from root to tip before touching titanium.
Damaged or color-treated hair
Temperature range: 250–320°FPorous hair overheats quickly, even if it looks thick. Color molecules can distort, and the cuticle becomes fragile under high heat.Use this range if:
You highlight or bleach
Your hair feels rough when wet
Your ends dry out faster than your roots
Knowing your ideal straightening iron temperature is the difference between sleek shine and slow, sneaky damage you do not notice until it is too late.
How to tell when your temperature is too high
Titanium lets you know when you are pushing your luck. Your hair starts signaling instantly—you just have to catch the warnings before they turn into full-blown damage.Look out for these red flags:
Ends flipping out quickly instead of smoothing
Steam that smells like hair, not water
Texture turning matte, especially at the tips
More tangles than usual after styling
Hair feeling stiff or crunchy after cooling
A sizzling sound (never a good sign)
A sudden lack of shine, even on healthy strands
If any of these show up, your temperature is too high—or your hair needs extra prep. Titanium is powerful, so dialing down by just one or two heat settings can completely change your results.
What makes a temperature truly safe
The safe temperature for titanium isn’t just a number. It is the combination of heat, preparation, surface contact, and control.Here’s what actually determines if your heat is safe.
Prep comes first
Hydration, slip, and smoothing ingredients help the hair move under the iron with less tension.
Even plates matter
Uneven plates create hot spots that burn sections faster than others. Quality tools prevent this.
Pass speed matters
One slow, intentional pass is safer than three fast ones.
Tension should be light
Titanium does not need aggressive pulling. Even gentle tension reduces friction damage.
Hair must be fully dry
Any leftover moisture can flash-boil inside the strand.Titanium is not unsafe, it is just efficient. Respect its efficiency and your hair stays glossy, not stressed.
Choosing your temperature based on your styling goal
Not every look needs the same heat. Your desired finish affects which setting is ideal.
Glass hair, silky and ultra-sleek
Opt for the higher end of your safe range.Prep with a smoothing spray and keep tension consistent.
Soft, natural straight
Stay in the mid-range.Allow bends and movement to remain.
Straight with volume at the root
Lower temps with curved passes.Lift the iron slightly at the base.
Blowout-inspired smoothness
Medium settings with larger sections.Pull outward and downward for a polished curve.
Products that support safe titanium styling
This is where TYME-approved products come in clutch. Lightweight hydrators, detangling sprays and smoothing formulas create the ideal slip for titanium styling. When your hair has the right foundation, titanium can work with less heat for the same glossy payoff.Look for:
Airy hydration mists
Lightweight smoothing treatments
Shine-enhancing sprays
Moisture-balanced priming formulas
Titanium performs best when the hair underneath is protected, conditioned and evenly prepped.
Common mistakes that sabotage your temperature settings
Even the perfect heat setting cannot save a routine full of small but mighty mistakes.
Using too-large sections
The heat cannot distribute properly.
Going in with damp hair
Instant damage—titanium is too fast and too hot for moisture pockets.
Using heavy oils pre-heat
They can cook on the hair and cause uneven marks.
Speed-running your passes
You should glide slowly but smoothly.
Not cleaning your plates
Product buildup cooks at high heat and transfers to your hair.
Setting heat high because it feels faster
Higher heat does not equal quicker results, just riskier ones.A few tiny tweaks lead to dramatically smoother styling.
How to experiment safely within your heat range
Titanium styling becomes art when you learn how to adjust your heat based on feedback.Here’s how to test safely:
Start at the lowest number in your recommended range
Make one pass on a small section
Check shine, texture and feel
Increase by 10–15 degrees only if needed
Never jump straight to the max
This method lets you find the ideal temp without shocking your strands.
The truth about turning the heat down
Most people think titanium straighteners demand the hottest setting, but the real magic happens when you use the right setting. That is when shine appears instantly, ends stay smooth all week and your hair keeps its strength instead of slowly losing it to invisible damage.Finding the safe temperature for titanium straighteners is all about being clever. Titanium is powerful, fast and efficient, which means you only need as much heat as your hair can comfortably handle. Once you match your temperature to your texture, your styling routine becomes easier, glossier and so much healthier.This is how you protect your hair without sacrificing the sleekness you love. Smarter heat gives you better results. Your hair looks polished instead of pressured. Reflective instead of fried. Strong instead of stressed.And the best bit? Once you find your perfect temp, every pass feels smooth, intentional, and visible in the mirror right away. That is how titanium was meant to be used. With precision, not guesswork.
The best smooth pre-styling sprays for flat irons
Better slip, less frizz, and smoother passes start right here
Flat-iron styling has entered its glossy era. Everywhere you look, hair is smoother, shinier, and sleeker than ever. But the part that most people miss? The secret isn’t the iron. It isn’t technique. It’s the prep. Specifically, the rise of modern pre-style treatments that set the foundation before the heat even comes near your hair.Pre-styling sprays have quietly become the most important step in a flat-iron routine. They loosen knots, add lightweight slip, boost shine, smooth down the cuticle, and create a clean, even texture that makes heat styling faster and easier. When this step is right, your flat iron glides instead of drags, the hair stays smooth instead of puffing back u,p and the finished style lasts longer without looking weighed down.And in 2026, pre-style sprays are having a moment. The silk-press-at-home trend. The revival of supermodel-smooth hair. The shift toward healthier styling routines. It all adds up to one universal truth: the finish of your flat-iron style is decided long before the iron heats up.The best pre-styling sprays for flat irons don’t feel heavy or sticky. They create softness without flattening volume, smoothness without greasiness, and shine without residue. They are the quiet force behind every silky, glossy look you double-tap on your feed.This guide is your full edit of the most effective and stylist-approved pre-style sprays to give your flat iron exactly what it needs: a perfectly prepped canvas.
Why prep matters more than people think
Most flat-iron fails have nothing to do with the iron. They start way earlier, in the seconds before you even plug it in. When hair isn’t prepped, the cuticle is raised, the texture is uneven, and the strands have zero slip. That is when the iron grabs instead of glides. That is when passes look streaky. That is when the ends flick out in every direction as if they have their own agenda.A great pre-style spray changes the entire experience. It softens the hair before heat steps in. It adds just enough moisture for flexibility without making the strands collapse. It creates that smooth, aligned surface the flat iron needs to deliver a glossy finish. And most importantly, it stops frizz before heat ever has a chance to activate it.Hair that is prepped behaves differently. One pass actually works. The finish is shinier. The movement is silkier. The style lasts longer. And the whole routine takes less effort because the foundation is already on point.This is why pre-styling sprays for flat irons are becoming every clean girl must have. They transform the way your flat iron performs by transforming your hair first.
The ingredients that actually make a difference
Not all pre-style sprays are the same. Some are barely more than scented water, while others deliver the kind of slip, hydration, and smoothness that instantly upgrade your results.Here are the ingredients that genuinely level up your flat-iron styling.
Featherlight moisturizers
Ingredients like glycerin or aloe hydrate without making the hair limp. They keep strands flexible so they straighten evenly.
Softening oils
Argan, moringa or coconut (in micro amounts) boost shine and reduce micro-frizz without weighing down the hair.
Botanical anti-frizz agents
Extracts like prickly pear, cucumber and spirulina calm puffiness and smooth the cuticle so the iron has an easier job.
Strengthening amino acids
These help fortify the hair, making it more resistant to breakage during brushing and flat-iron tension.
What to avoid
Heavy silicones that leave buildup, alcohol-heavy sprays that dry out the cuticle and thick butters that suffocate movement.The best formulas feel invisible but perform loudly. Always.
TYME’s top prep picks
A smooth flat-iron finish starts with the right first step, and TYME’s lightweight styling essentials are crafted to complement the TYME Iron Pro perfectly.Think airy hydration, soft slip and treatments that enhance shine without greasiness. TYME’s handpicked formulas prep the hair so the Iron Pro glides through with less resistance and more payoff.
Explore TYME haircare here
The best smooth pre-styling sprays for flat irons
Here’s the insider-approved list of pre-style sprays that stylists, blowout pros and flat-iron obsessives are relying on in 2026. All smooth. All lightweight. All perfect for anyone wanting that glassy flat-iron finish.
Bumble and bumble Prep Primer
The detangling queen. Weightless, vitamin-rich and perfect for resetting second-day texture. This one melts tangles instantly, making your flat-iron passes cleaner and faster.Shop now
IGK Good Behavior 4-in-1 Prep Spray
A frizz-control powerhouse. The coconut and spirulina combo smooths puffiness on contact, and the finish feels silky rather than coated. Ideal for humidity-prone hair.Shop now
Bumble and bumble Hairdresser’s Invisible Oil Primer
Loved by anyone with thick, coarse or fragile hair. The six-oil blend conditions and softens without heaviness, creating a flexible foundation for sleek styling.Shop now
Verb Ghost Prep
For the girl who wants weightless everything. The formula adds the perfect amount of slip and hydration so the flat iron glides instead of drags.Shop now
R+Co One Prep Spray
A full-on revitalizer. Aloe, prickly pear and cucumber extracts soothe the scalp and hydrate the strands. Ideal for hair that feels dull or dehydrated before styling.Shop now
K18 Molecular Repair Mist
A modern favorite for damaged or overprocessed hair. This lightweight treatment strengthens the hair before heat, which means smoother passes and fewer snags.Shop now
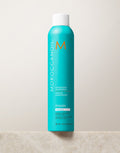
Moroccanoil Perfect Defense
Argan-infused and ultra-fine. Adds just enough moisture and slip for a smooth finish, especially on hair that tends to frizz once heat hits it.Shop nowThese are the sprays that consistently deliver glossy, smooth, flat-iron results without heaviness or buildup.
How to use pre-styling sprays for a smoother flat-iron finish
A great product only works when you use it intentionally. Preps need to coat the hair lightly and evenly to create that soft, slip-enhanced base.
Spray from mid-lengths to ends
Avoid the root unless the formula is specifically designed for scalp care. Most smoothing sprays perform best through the areas your flat iron will work hardest.
Comb through for even distribution
A quick pass with a brush or wide-tooth comb ensures every strand gets the benefits.
Let the product settle
Give the spray a few seconds to soak in before heat. This prevents sizzling and ensures a smoother glide.
Use less than you think
Pre-style sprays are meant to be airy. Oversaturating will flatten volume and reduce shine.
Works on damp or dry hair
Some formulas prefer damp hair. Others love dry hair. Always match the method to the product’s texture.
Stylist-approved tricks for the silkiest flat-iron results
These are the tiny adjustments that create that impossibly smooth finish.
Work in small, clean sections for consistency
Use light tension, not aggressive pulling
Match your pass speed to your hair density
Keep the hair parallel to the iron for a polished look
Make one intentional pass instead of three rough ones
Use the TYME Iron Pro’s angled plates to smooth more efficiently
With the right prep spray and a smart technique, the hair straightens faster, looks shinier, and stays sleek longer.
How to choose the right pre-style spray for your hair type
Not every pre-style treatment works for every texture. The ticket is choosing a formula that supports the way your hair naturally behaves, instead of forcing it into submission. When you match your spray to your hair type, your flat-iron routine becomes faster, smoother, and a lot less dramatic.
If your hair gets frizzy easily
Look for sprays with lightweight oils or botanical anti-frizz agents. These help calm the surface before heat steps in and keep puffiness from creeping back in the moment you step outside. IGK and Moroccanoil are stars here.
If your hair is fine or gets greasy fast
Go for ultra-weightless hydration. Think featherlight mists that detangle and soften without adding any heaviness. R+Co One Prep and Verb Ghost Prep keep the hair silky without collapsing your volume.
If your hair is thick, coarse or naturally dry
You need a richer mist that gives your strands something extra to hold onto. Bumble and bumble Hairdresser’s Invisible Oil Primer adds deep softness and smoothness without making the hair feel coated.
If your hair feels fragile or overprocessed
A strengthening pre-style spray makes a huge difference. K18 and protein-infused mists give the hair support so it can handle heat without snapping or snagging.
If you live in a humid or dry climate
Humidity fighters for tropical weather. Humectant-rich sprays for dry, desert-like air. Your environment impacts your finish as much as your hair type.
The final touch your flat-iron routine deserves
Flat-iron styling has evolved, and so has the expectation. Smooth hair is no longer a lucky outcome, it is the standard. And pre-style sprays are the step that gets you there. They take the stress out of heat styling, set up your strands for a flawless glide, and let your flat iron work with ease instead of fighting through rough, unprepared texture.Once you start using the right pre-styling sprays for flat irons, everything changes. Your hair stops frizzing the moment you walk outside. Your ends stop flipping out at random angles. Your passes get cleaner, your shine gets brighter, and your style lasts longer without touch-ups. It is the difference between hair that cooperates and hair that makes you consider cancelling plans.Great flat-iron results are built before the heat even turns on. When the prep is right, the styling becomes smoother AND more polished. This is the moment your routine transforms from basic to professional-level—and your hair shows it from the very first pass.
How to blend flat-iron curls for the softest finish ever
Because unblended curls aren’t cute, girlie
There’s a moment every flat-iron user knows far too well. You finish curling your hair, flip the ends with confidence, run your fingers through a few pieces… and suddenly the curls separate into stiff little spirals that look nothing like the soft, blended waves you had in mind. Some are too tight. Some fall flat. Some take on a strange direction no one requested. It’s the kind of result that makes you question everything.Here’s the honest truth most tutorials skip. Curling is the easy part (cry). Blending is the magic. Blending is the reason some people walk out of their bathroom looking like they have a professional blowout, while the rest of us are stuck with curls that sit awkwardly apart like they need assigned seating. When flat iron curls aren’t blended properly, they lose movement, lose shape and lose that effortless, modern finish everyone is after right now.And the world has officially entered its texture era. Soft waves. Airy bends. Light bounce. That perfectly undone, lived-in look. It’s everywhere—from red carpets to quiet luxury hair on TikTok—and every version of it comes down to one thing: blending.This is where the TYME Iron Pro shines. Its plate design and glide create curls that naturally fall into shape, which makes blending smoother and quicker. With the right technique, your curls won’t just look curled—they’ll look cohesive and impossibly soft.Now, if you’re ready to master how to blend curls made with a flat iron and finally get the fluid, cool-girl waves that move as one, you’re in the right place. Let’s get your curl routine upgraded.
Why blending matters more than curling
There is a reason two people can use the exact same flat iron and walk away with completely different results. One gets smooth, cohesive waves. The other gets stiff little spirals that refuse to connect with anything. The tool isn’t the issue. The curling isn’t the issue. The missing step is blending.Flat iron curls come with their own personality:
A sharper bend at the twist
A sleeker, glossier finish
Ends that naturally taper
A more structured curl pattern
Gorgeous, but only when they flow.When curls sit in separate pieces, the whole style loses its impact. It can look overly done, overly curled or overly sectioned.Blending is what changes everything. It:
Softens the curl pattern
Connects each section so waves move as one
Adds that loose, sweeping finish
Removes the harsh, separated look
Creates that modern, airy movement everyone wants
This is the step that takes curls from styled to effortless.From placed to natural.From okay to expensive.Once you understand how to blend curls made with a flat iron, the entire look transforms. Your curls stop fighting each other and start working together. They fall into shape, move with your hair and give a finish that feels intentional without ever looking overworked.
Prep is the secret to effortless blending
Most people focus on the curling technique and skip straight past the prep, but prep is the quiet powerhouse behind every soft, blended wave. If the hair isn’t primed properly, curls cling together, hold odd bends or fall flat before you even make it to the blending stage.Great blending starts long before the flat iron touches your hair.
Start with clean, lightweight moisture
Heavy products lock the hair together. Lightweight formulas keep movement alive.
Choose hydrating but airy leave-ins
Avoid anything overly oily
Keep products mid-length to ends for even slip
This creates a smooth canvas that responds beautifully to blending.
Protect the hair without weighing it down
A dense heat protectant can sabotage your blend before you even begin. Go for a micro-fine mist that shields the hair without creating stickiness.
Lightweight protectants are perfect here
Aim for full coverage without saturation
Keep roots minimal to avoid clumping
The goal is protection with zero heaviness.
Even texture equals even curls
Before curling, smooth the hair so every section behaves consistently. Uneven texture causes uneven curls, and uneven curls refuse to blend.Try this quick reset:
Brush through from roots to ends
Detangle fully
Add a touch of smoothing serum only if needed
Flat iron curls sit best when the hair has slip, shine, and balance.This prep routine sets the tone for everything that comes next. Once the hair is hydrated, even and lightweight, blending stops being a struggle and starts feeling like a natural part of the process.
Why the TYME Iron Pro levels up your curl blend
Not all flat irons create curls the same way. Some leave dents. Some snag. Some create tight, uncooperative spirals that refuse to blend no matter how many times you rake your fingers through them. The TYME Iron Pro was designed differently, and that difference shows up instantly when it is time to blend.Here is why TYME girlies have an easier time achieving that PERF-ect finish.
The angled plates do half the shaping for you
The unique plate design creates a smoother, more natural twist. Instead of a harsh bend, you get a soft curve that blends into the next section without effort.
The glide is unbelievably smooth
No grip. No drag. No awkward tugging.A clean glide equals curling that feels fluid and blending that feels easy.
The temperature stays consistent
Flat iron curls only blend well when each section has the same heat exposure. The TYME Iron Pro maintains even heat from root to ends, which means the curls behave consistently.
The built-in curve creates better movement
You are not fighting the tool to make the curl fall correctly. The shape of the iron encourages movement, and movement is what makes blending possible.
Better curls from the start
You can blend flat iron curls from any tool, but starting with curls that already have the right structure makes everything easier.
Explore TYME Irons here
Once your tool is working with you and not against you, everything after this point becomes significantly easier.
The curling technique that makes everything easier
Before blending even enters the conversation, the curl needs the right foundation. Flat iron curls behave differently than wand curls, so the technique has to support softness and movement from the start. If the curl is too tight, too bent or too heavy at the ends, blending becomes ten times harder.These are the modern rules for creating curls that practically blend themselves.
Work in vertical sections
Vertical sections encourage movement rather than stacking curls on top of each other. They create waves that fall into one another instead of sitting like rings around the head.
Vertical for softness
Horizontal for tighter, structured curls
Diagonal for glam volume
For a blended finish, vertical always wins.
Alternate the direction of each curl
This is the secret behind waves that look natural rather than uniform. Alternating directions creates texture, depth and dimension, which makes blending quick and effortless.
One curl away from the face
Next, curl toward the face
Repeat around the head
This prevents the curls from grouping into one big twist.
Keep the ends slightly relaxed
Flat iron curls look most expensive when the ends have a gentle, effortless finish. Letting the ends glide out creates a modern taper that blends beautifully.
Release the last inch or two
No tight ends
No crunchy spirals
This is the move that adds softness.
Glide smoothly from roots to ends
The curl should be created by the rotation of your wrist and the motion of the tool, not by clamping too tightly. A smooth glide prevents harsh bends and makes blending almost automatic.
Light tension
Consistent motion
No stopping halfway down
Allow the curls to cool before touching
Warm curls are fragile and will distort as soon as you run your hands through them. Cool curls hold their shape while still softening beautifully during blending.
Curl
Cool
Then blend
This single step fixes half of blending problems.Now that your curl pattern is set up for success, we can move on to the techniques that give flat iron curls that soft, expensive finish.
The blending techniques that make flat-iron curls look expensive
This is the part that separates a simple curl from a FULL moment. Blending is where the shape softens, the movement appears and the hair starts to look intentional instead of overly curled. Think of this as the finishing touch that turns technique into taste.Here are the techniques that actually work in real life.
The under-finger rake
This is the quickest way to loosen flat-iron curls without turning them into frizz.
Slide your fingers underneath the hair
Gently rake from mid-lengths, not roots
Let the curls fall naturally as you lift your hand away
It keeps the definition but breaks up the stiffness, creating that soft, touchable finish that feels effortless.
The root lift shake
If your hair tends to collapse at the top or sit too flat, this move brings instant life back.
Place your fingertips at the roots
Shake lightly
Let the lengths cascade back into shape
This creates movement without disturbing the curl pattern. Perfect for that airy, bouncy finish.
The soft brush-out
This is how stylists turn flat-iron curls into those sweeping, almost blowout-like waves.Choose your tool:
Wide-tooth comb for loose, beachy texture
Paddle brush for smooth, brushed-out volume
Mixed-bristle brush for glossy, glam waves
Brush through with long strokes and gentle pressure. No quick, rough brushing—that is what causes puffiness.
The mid-length massage
This trick blends the body of the curl while keeping the ends polished.
Place your fingers at the center of the curl
Massage in small circular motions
Release and let the curl settle
It gives the waves a little more airiness without unravelling them completely.
The twist-and-drop
Ideal when your curls feel a bit too defined at the ends.
Twist a section loosely
Drop it while running your fingers through the release
Let gravity soften the shape
This technique turns freshly curled ends into a relaxed, editorial texture.
The small-section sweep
For curls that look too piecey or sectioned.
Take thin pieces randomly throughout the hair
Sweep them across the larger waves
Smooth lightly with your fingers
This adds movement and depth without changing the curl pattern.
Avoid these common mistakes
A few tiny shifts can make or break your blend.
Blending while the curls are still warm
Using heavy oils before brushing
Brushing too aggressively through the ends
Working in overly large sections
Over-touching curls until they lose shape
The last word on soft, blended curls
Flat-iron curls can either look chic or chaotic, and blending is the line between the two. No one has time for poodle curls, crunchy spirals or curls that sit like separate little characters. When you blend properly, you unlock the version of your hair that *actually* matches your mood boards.With smart prep, the right flat iron and a few intentional blending moves, your curls will always fall into that smooth, modern wave pattern that feels expensive and lived-in at the same time. It is the finish that looks good from the back, the front, in photos, in daylight and in that accidental reflection you catch walking past a window.Once you get your blend right, flat-iron curls stop being a gamble and start becoming your signature. Are you ready? Because we certainly are.
Shop the Tyme Iron Pro today
Your winter survival guide to the best heat protectant for wigs and extensions
Dry air, hot tools, icy wind—your wigs need a winter shield ASAP
If there were ever a season designed to sabotage a perfect wig install, it’s winter. The dry air? Rude. The icy wind? Chaotic. The indoor heating? Straight-up villain behavior. One minute your hair is giving smooth, silky, main—character energy… and the next it feels like a crunchy Christmas wreath that’s seen better days. And girlie, if you’re rocking extensions too? The struggle gets SO personal.Here’s the thing no one really tells you when you enter your wig and extension era: winter doesn’t just make your skin thirsty. It does the same to your hair—especially hair that didn’t grow from your scalp. Human hair wigs, synthetic wigs, clip-ins, toppers, sew-ins… they all lose moisture faster in cold weather. Add your TYME Iron or favorite hot tool into the mix and, bam, you’ve basically created the perfect storm for dullness, dryness, tangles, and that dreaded mid-length frizz.Which is exactly why finding the best heat protectant for wigs and extensions in 2026 isn’t just a nice-to-have. It’s the winter survival kit your hair deserves.Heat protectant isn’t simply a spray you mist before styling anymore. In 2026, formulations are smarter, lighter, and engineered with the kind of hydration tech wigs and extensions actually respond to. And let’s be honest, your human hair wig doesn’t need the same protection as your synthetic baby. Your 26-inch install doesn’t vibe with the same formula as your everyday clip-ins. Your winter hair routine needs strategy—AKA products that act like a warm cashmere coat for your strands.So, we’re breaking down everything you need to know. From the new-gen heat protectant ingredients to the wig-friendly formulas editors swear by, to the winter rules your stylist wishes you’d follow, and the number one product that’s changing the game for every wig babe right now.
Why heat protectant hits different for wigs in winter
Winter is basically the season of “let me test your patience, girlie,” especially when it comes to wigs and extensions. Your hair is already living its best life in a world where it doesn’t get the natural oils your scalp gives your bio hair. Then winter walks in like, “What if I made everything extra dry and unpredictable?” Cute.
The winter hair chaos is real
Here’s what your wig or extensions deal with the moment temps drop:
Cold outdoor air that pulls moisture right out of your strands
Dry indoor heating that makes hair brittle and static-prone
Constant temperature changes—outside freezing, inside Sahara
Holiday-season heat styling, which means even more damage risk
And because wigs and extensions don’t receive natural oils, they feel all of this way more intensely.
What actually happens to your hair
When moisture drops, flexibility drops. That’s when you start noticing:
Stiff mid-lengths
Random frizz that wasn’t invited
Static that has you looking like you rubbed a balloon on your hair
Tangling—especially with longer extensions
Winter is the toxic ex of every wig install: unpredictable, draining, and *always* showing up at the worst time.
Enter your winter MVP: heat protectant
This is where a heat protectant for wigs becomes more than a quick spritz before curling. It turns into a barrier—the glossy, invisible winter coat your hair needs.
A good protectant will:
Lock in moisture
Reduce breakage from heat styling
Add softness and slip (aka fewer tangles)
Defend against your hot tools and the dry winter air
And let’s speak truths, babe…
You’re using your hot tools more in winter.Holiday parties, date nights, office events, and every “my hair is flat from my scarf, let me fix this” moment.If you’re reaching for your TYME Iron, your hair needs to be protected—especially if you’re aiming to use the best heat protectant for wigs and extensions to survive winter without going dull or brittle.Winter is out here fighting your hair. And your heat protectant? She’s the friend who always throws the first punch back.
The non-negotiables for heat protectants
Heat protectants have had their glow-up, and in 2026 the bar is sky-high—especially for wigs and extensions. The formulas hitting shelves now are smarter, lighter, and built to survive winter dryness, static, and the “I’m styling my hair every 48 hours” era we’re all in.Here’s what actually matters when choosing a winter-proof heat protectant for wigs.
The ingredients that matter this year
A good 2026 formula should deliver a full vibe shift for your strands. Look for:
Real hydration power from humectants and vitamin blends
High-temp protection for human hair installs
Static control, because winter is obsessed with making hair float
Softer movement so wigs and extensions don’t stiffen up
Shine boosters that revive dull winter hair instantly
A light, clean finish that won’t weigh down long installs
These are the textures and finishes stylists are reaching for when winter air starts stealing moisture. It’s not about coating your hair. It’s about creating a flexible shield that moves with it.
Human hair wigs vs synthetic wigs
Both deserve attention, but they need different things to thrive.
Human hair wigs
Human hair responds beautifully to nutrient-rich formulas, especially in the colder months. What works best:
Hydration that lingers
Formulas with vitamins, polymers, or light botanical oils
Protection up to 400–450°F
A mist that spreads evenly without making hair limp
This is the zone where premium products really shine.
Synthetic wigs
Synthetic fibers live by different rules. They melt under high temps and hate heavy ingredients. They need:
Lower temperature styling
Lightweight, fast-drying protectants
Zero greasiness
Anti-static support (their winter enemy #1)
If human hair is the high-maintenance princess, synthetic is the minimalist girlie: simple, gentle, clean (but melts under pressure!).
What makes 2026 formulas better than ever
This year’s best products are engineered for wig wearers who style often. Expect:
Ultra-fine mists that fully coat long lengths
Anti-breakage support designed for repeated hot tool use
Winter-friendly moisture retention tech
Static-neutralizing complexes for scarf season
Silky finishes that don’t dull or crust on synthetic fibers
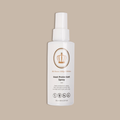
The editor’s #1 pick—The Lauren Ashtyn Moisture Hydrate Heat Protectant Spray
There are great heat protectants… and then there’s the one the wig and extension girlies keep in their handbags, bathroom drawers, glove compartments, and every travel case they own. The Lauren Ashtyn Moisture Hydrate Heat Protectant Spray has officially entered the chat and honestly? The hype is fully deserved.This spray wasn’t just made for polished blowouts or soft curls. It was created specifically for wigs, extensions, and toppers. Finally, a formula that understands the assignment.
Why it takes the top spot in 2026
The moment winter rolls around, this spray becomes non-negotiable. It hits every concern wig wearers battle this season:
Protects up to 450°F, perfect for TYME Irons and other hot tools
Lightweight finish that doesn’t leave wigs stringy or product-heavy
Moisture-boosting formula that keeps strands soft even on icy days
Shine enhancement without greasiness
Multivitamin blend for restoring life to dry, dull, older installs
Extension-safe, meaning no slipping, no build-up, no weird residues
While other sprays focus on natural hair first, this one was born to serve the wig and extension community. It’s basically the blueprint.
How it behaves on human hair wigs
Human hair wigs LOVE this spray—especially in winter. The formula wraps each strand in hydration, giving the hair that “fresh install” bounce while defending it from high heat.Expect:
Softer movement
Less breakage
Better curl longevity
Fewer winter tangles
This is the kind of product that revives a human hair wig that’s starting to feel tired.
How it behaves on synthetic wigs
Synthetic wigs are picky. One wrong move and the fibers clump, stiffen, or look shiny in a bad way. This spray avoids all of that by being:
Lightweight
Non-oily
Evenly dispersing
Static-taming
It gives synthetic fibers a smoother finish while helping them withstand low-temp styling without melting or frizzing up from winter dryness.
How to use it for the best results
Start with towel-dried hair
Spray it through the mid-lengths and ends (avoid roots on extensions)
Comb through to distribute
Blow dry or style with your favorite hot tool
The mist is ultra-fine, so a little goes a long way—but it covers every strand without leaving heavy patches.
The 2026 hot list—other heat protectants that wigs love
Our GOAT product might be the Lauren Ashtyn Moisture Hydrate Spray, but a good wig babe always keeps her options open. These are the formulas earning a place on editor desks, glam squads, and “must-pack” lists this winter.
Moroccan Oil Perfect Defense
A classic for a reason. This weightless, argan-infused mist keeps strands smooth, shiny, and soft without leaving any oily residue. Wig girlies love it for calming winter static and bringing life back to dry mid-lengths. Perfect for sleek blowouts and soft curls.
Shop now
Bumble and Bumble Thermal Protection Mist
Light, airy, and always dependable. This mist protects while adding a subtle, healthy glow to wigs and extensions. It’s a favorite for fibers that frizz up the second cold air hits. The fresh scent is just icing on the cake.
Shop now
Kerastase Premiere Anti-Frizz Heat Protecting Serum
A full-on frizz fighter. This serum locks in moisture and shields wigs from humidity, icy wind, and winter dryness. If your hair tends to puff, fluff, or expand on contact with the outdoors, this serum keeps everything smooth and polished.
Shop now
Blockade Heat Defense Serum
Smooths, protects, and adds a soft, salon-level shine. It gives long wigs and extensions the slip they need to avoid knotting in winter coats and scarves. A great pick for girlies who heat style often.
Shop now
Why these picks made the list
These formulas all deliver the winter essentials:
Lightweight, wig-safe protection
Even coverage on long lengths
Anti-frizz support
No heavy oils that stiffen fibers
Shine without grease
They won’t replace your hero product, but they give you a lineup of winter-ready options depending on your hair’s styling routine.
Ready for your winter wig protection?
Winter might not be the friendliest season for wigs and extensions, but the right routine flips the whole script. With smart styling, the right tools, and a heat shield that *actually* delivers, your hair can stay glossy and protected from the holiday party rush straight through the icy months.The secret is choosing products built for the job (especially the ones engineered for wigs and extensions) because they make heat styling safer, add moisture back into every strand, and keep your look consistent no matter how chaotic the weather gets. So step into the season with confidence. Your wigs can stay silky. Your extensions can stay polished. And your heat tools? They can get to WORK, without doing the damage. AW25 doesn’t stand a chance.
Does tea tree shampoo help with dandruff?
A natural fix or just a tingly trend?
Tea tree shampoo has become a go-to for anyone dealing with flakes, itch, or irritation. It promises a natural cure, a refreshing tingle, and a cleaner scalp without harsh medicated ingredients. With shelves full of “clarifying,” “purifying,” and “anti-dandruff” tea tree formulas, it’s easy to assume it’s the simple fix we’ve been waiting for.
But scalp issues aren’t all the same. Dandruff can come from oily buildup, an overgrowth of yeast on the scalp, inflammation, or even the wrong products (not just dryness). That’s where the confusion starts. Some people swear that tea tree instantly relieves itch and flakes, while others don’t notice a difference at all.
So does tea tree shampoo help with dandruff, or are we just enjoying a tingly sensation that feels like it’s working? The truth is a little more nuanced, and answers depend on what’s actually causing your flakes in the first place.
If you’re dealing with oily roots, constant itching, snowy shoulders, or stubborn buildup, below we’re breaking down how tea tree works, who it helps, and when you might need something stronger than a refreshing shampoo.
Let’s start at the root: what causes dandruff?
When flakes start showing up on your shoulders, it’s easy to blame dryness—but that’s not usually the real cause. Most dandruff is linked to an overgrowth of yeast on the scalp called Malassezia, a microorganism that naturally lives on our skin. When it feeds on excess oil, it can irritate the scalp, disrupt its balance, and lead to itching, flaking, and inflammation. So while dandruff looks dry, it often comes from too much oil, not a lack of moisture.
Another common culprit is product buildup. Heavy oils, thick conditioners applied to the scalp, and styling products that aren’t washed out properly can trap excess oil and yeast close to the skin. This creates a perfect environment for flakes to form.
Then there are cases triggered by sensitive scalps, allergies, or inflammation. These can mimic dandruff, but they aren’t caused by the same fungal overgrowth and may require a different approach (like calming ingredients instead of clarifying).
The key misconception to clear up? Dry scalp ≠ dandruff. Dry scalp creates small, powder-like flakes without itch or redness, while dandruff tends to come with yellowish flakes, irritation, and oiliness. Because the causes differ, simply adding moisture won’t fix genuine dandruff, and ignoring the underlying imbalance just allows the issue to keep coming back.
Tea tree oil 101
Tea tree oil comes from the leaves of the Melaleuca alternifolia plant, a native Australian tree long used in traditional medicine for its cleansing and soothing properties. It’s gained popularity in modern haircare because it naturally targets many of the scalp issues associated with dandruff without needing harsh, medicated ingredients.
The big reason you’ll see it in cleansers and scalp formulas is its antimicrobial and antifungal powers. In simple terms, tea tree oil helps reduce the yeast linked to dandruff while also preventing buildup from oils and products that can make flakes worse. Instead of just washing away surface debris, it supports a cleaner, more balanced environment for the scalp. These tea tree benefits for hair are why so many “purifying” and “refreshing” shampoos highlight it as a star ingredient.
Another advantage is its ability to relieve itch and inflammation. Many people experience instant relief because tea tree creates a cooling effect on the skin, helping calm irritation—even before major improvements in flakes are visible. That’s one reason tea tree shampoos feel like they’re “working” right away, even if you need regular use to see a reduction in flaking.
One important note: tea tree oil is strong in its pure form and can easily irritate or burn the scalp if applied directly. That’s why it’s diluted in shampoo, conditioners, and scalp treatments—it delivers its benefits without overwhelming the skin. If using it at home, it should always be mixed into another product first to avoid irritation.
So… does tea tree shampoo help with dandruff?
The short answer: yes, tea tree shampoo can help reduce dandruff—but only when the flakes are caused by the most common triggers. If your scalp issues come from fungal overgrowth, excess oil, mild buildup, or irritation, tea tree shampoo can make a noticeable difference. It works by reducing the yeast that fuels dandruff, cleansing excess oils, and calming the itchiness that often comes with flakes.
However, results don’t happen overnight. Tea tree shampoo needs consistent use over several washes to rebalance the scalp. You may feel instant relief from itching because of its cooling sensation, but that doesn’t mean the dandruff has already cleared. This is where tea tree gets confused with a “miracle fix”—that refreshing tingle can create a placebo effect, making it feel like the product is working before it actually has time to do its job.
So does tea tree shampoo help with dandruff in every case? Not quite. If your flakes come from scalp psoriasis, eczema, contact dermatitis, or very stubborn fungal infections, tea tree alone usually isn’t enough. Those conditions may require medicated anti-dandruff shampoos with ingredients like ketoconazole, selenium sulfide, or zinc pyrithione. In these situations, tea tree shampoo can be a great maintenance option, but not the main treatment.
Pay attention to the concentration, too. Tea tree formulas in the 2–5% range tend to be the most effective. Anything too diluted may feel nice without offering real results, while heavily concentrated pure oils can irritate or burn the scalp.
Who should use tea tree shampoo?
Not everyone with flakes needs tea tree shampoo. It’s effective for certain scalp issues, and too harsh for others. Here’s how to tell if it’s the right choice for you:
Tea tree shampoo is ideal if you have:
Oily scalp or roots that get greasy fast
Mild to moderate dandruff linked to oil and buildup
Itching that gets worse after sweating
“Gym hair” or flakes that show up after workouts
Product buildup from heavy conditioners or styling products
Flakes that improve when you clarify your scalp
Tea tree shampoo may NOT be right if you have:
Powdery, dry flakes with tightness (likely dry scalp, not dandruff)
Inflamed eczema or painful irritation
Sensitive skin that reacts easily to fragrances or strong ingredients
Scalp conditions that need medicated treatments (psoriasis, severe fungal issues)
Before you commit:
Always patch test if you’re sensitive
Remember: tea tree doesn’t cure dandruff permanently—it helps manage it with consistent use
Tea tree shampoo supports scalp balance, but your results depend on what’s actually causing the flakes.
How to use tea tree shampoo correctly
Using tea tree shampoo the right way matters just as much as choosing the right formula. Done correctly, it can reduce flakes and itch; used incorrectly, it may not do much at all. Here’s how to get real results from your routine:
Wash the right way
Apply tea tree shampoo directly to the scalp (not just the hair).
Massage gently with fingertips or a scalp brush.
Leave it on for 2–3 minutes before rinsing—this gives the ingredient time to work.
Rinse thoroughly to prevent buildup.
How often to use it
Oily or flaky scalps: use tea tree shampoo 3–4 times a week.
Balanced or slightly dry scalps: 1–2 times a week is enough.
Rotate with a gentle, non-stripping shampoo to avoid irritation.
Condition strategically
Use a lightweight conditioner only on mid-lengths and ends, not on the scalp.
Avoid heavy butters, thick oils, or waxy leaves as they can trap yeast and make dandruff worse.
Pair it with the right extras
Use a scalp exfoliating brush or scrub once a week to prevent product buildup.
Skip heavy oil masks on the scalp (they feed the fungus that causes dandruff). If you need some moisture for your ends, try a lightweight moisture repair spray instead.
If flakes persist, pair tea tree shampoo with a scalp serum or leave-in treatment containing tea tree extract for added benefits.
When to skin the add-ons
✗ Avoid mixing pure tea tree oil directly into shampoo unless you know the concentration—it’s easy to overdo and irritate the scalp.
✗ Never apply pure oils directly to the scalp during an active dandruff flare.
✗ Used correctly, tea tree shampoo can support a healthier, cleaner scalp—but consistency and technique are key.
When tea tree isn’t enough
Tea tree can calm the scalp and manage mild dandruff, but some conditions need a stronger, medically proven treatment. If your flakes persist after multiple weeks of consistent use, or if you’re dealing with thick yellow flakes, bleeding from scratching, or large patches of redness, it’s time to step up to a medicated formula.
Medicated shampoos to consider:
Zinc pyrithione: reduces yeast and soothes inflammation.
Ketoconazole: targets more stubborn fungal overgrowth.
Selenium sulfide: slows excess skin shedding and helps with itching.
These shampoos are designed to actively treat dandruff at the source, while tea tree shampoo works best as a supportive cleanse. The two can work together:
Use a medicated shampoo as your treatment,
and tea tree shampoo as maintenance once flakes improve.
When tea tree isn’t enough, it doesn’t mean it failed—it means your scalp needs extra help to reach a healthy baseline.
A refreshing ally, not a cure-all
Tea tree shampoo can absolutely help with dandruff when flakes are caused by oil buildup, fungal overgrowth, or irritation. It’s not a cure, and it won’t fix every scalp issue, but used correctly and consistently, it supports a cleaner, calmer, less itchy scalp.
Remember to patch test, pay attention to what triggers your flakes, and swap to medicated options when necessary. Want more scalp truth from real stylists? Visit the LifeTYME blog for salon-backed haircare tips.
“How to” mullet haircut guide (cut, styles + maintenance)
Business in the front, party in the… wait—what year is it?!
It wasn’t too long ago that the mullet was the haircut people joked about—the punchline, the “what were we thinking?” moment of 80s style. Fast-forward to today, and suddenly the once-cringeworthy cut has become one of the most requested looks in salons. What happened? The mullet didn’t just come back… it evolved. The modern mullet haircut is softer, shaggier, more intentional, and surprisingly wearable for different hair textures and personality types.
Let’s rewind, shall we? Think back to David Bowie’s androgynous glam-rock shape, Billy Ray Cyrus’s country version, and 80s teen idols who wore the look like a badge of rebellion. Today’s mullet revival has its own icons: Miley Cyrus, Zendaya, K-Pop stars like TXT’s Yeonjun, and even TikTok creators who turned it into a genderless, edgy staple.
Maybe you’re thinking about getting one and want to know exactly what you’re signing up for. Or maybe you already have a mullet and you’re trying to figure out how to style it without looking like you time-traveled from a 1987 concert tour. Either way, you’re in the right place.
Below, we break down how to mullet haircut options, how to cut and style them, and how to keep yours looking chic (not ironic).
The mullet: a haircut that breaks the rules
A mullet is built on contrast: shorter at the front and sides, longer in the back. It doesn’t follow traditional haircut rules, and that’s exactly the point. Instead of creating symmetry or a clean blend from root to ends, the shape leans into uneven lengths to create personality and movement.
Where other cuts aim for balance, a mullet creates interest through imbalance. The shorter layers around the face can look like a bob, a shag, or a cropped cut, while the longer back adds length, texture, or softness depending on how it’s styled.
Today’s mullet isn’t stuck in the past. Modern versions use softer transitions and light layering, which makes them easier to wear for different hair textures and densities. It’s a haircut that adapts to the person wearing it and shows up differently depending on how it’s styled each day.
5 modern mullet haircuts for women
Whether you want something dramatic or something you can downplay when needed, there’s a version designed to fit how you live with your hair—not just how it looks the day you cut it.
1) The soft wolf cut
Source: Butchers Salon
This is the mullet that went viral, and for good reason. The soft wolf cut uses face-framing layers and feathered volume to give texture without exposing hard lines. It’s shorter around the crown and sides, but the transition into length is more gradual than a classic mullet. The result feels undone without looking messy. Best for wavy and curly hair that benefits from weight removal at the top. On straight hair, it may need a little styling help—texture sprays, matte pomades, or subtle waves go a long way in making the layers visible without crunch or stiff hold.
2) The shag mullet (shullet)
Source: Pinterest
The “shullet” blends shag-like layers with the classic mullet silhouette, giving movement at the crown and a soft, lengthier back. It frames the face with airy, wispy finishes and feels more editorial than retro. If you want a haircut that can shift from casual to high-fashion styling, this version has range.
This cut works well for people who love bangs, whether blunt, wispy, curved, or micro. It brings attention to the eyes while keeping the back loose and free. It’s versatile with heat-styling but especially flattering when air-dried with a curl cream or wave spray that enhances natural bends.
3) The curly mullet
Source: Hermosa Hair
Designed specifically for texture, the curly mullet is all about sculpting shape without weighing curls down. Shorter layers on the top and sides open up the face, while the longer back keeps curl pattern intact and adds bounce. The cut helps curls fall into shape naturally without stacking too much volume at the crown.
This style thrives on moisture and definition products rather than heavy oils or thick creams. A lightweight gel or curl foam can hold shape without flattening or hardening the curl. The more natural body the hair has, the more interesting and dynamic the overall silhouette becomes.
4) The micro mullet
Source: Byrdie
A micro mullet takes the length down dramatically, keeping only a short tail at the nape. Instead of relying on length for drama, it uses shape and texture. The front can resemble a pixie, while the back adds a subtle flick or soft drop of length. It’s an expressive cut that works especially well for those who like statement bangs, chopped edges, or undone texture. Since there’s less length to balance mistakes, it’s a cut that benefits from a professional stylist rather than a DIY attempt. Styling is simple: matte waxes or texture pastes accentuate the layers and make the shape more intentional.
5) The long mullet
Source: Latest Hairstyles
The long mullet keeps significant length in the back and mid-lengths while introducing strategic layering around the crown, face, and sides. It gives movement without sacrificing length, making it a good choice for anyone who wants mullet energy without fully committing to a shorter crop. This cut is ideal for wavy or straight hair that needs help creating shape. Because the bulk of hair remains long, styling options stay flexible—half-up looks, braids, beach waves, or blow-dried volume all work with minimal effort. Maintenance is lighter too; trims focus on the shorter layers rather than the full length.
When choosing between these styles, the biggest factor is how much shaping you want in the front and how much length you’re willing to keep in the back. The modern mullet is anything but one-size-fits-all, and these variations allow the haircut to adapt to personality, lifestyle, and hair type.
How to cut a mullet (DIY… but seriously, consider a salon)
A mullet relies on deliberate imbalance, which means shaping it isn’t as simple as chopping the back or shortening the front. If you’re determined to try a DIY version, the goal should be creating structure, not just removing length. The cut lives or dies by how cleanly the layers transition from short to long, so approach the process with patience and a plan.
Here’s a simplified way to attempt a mullet at home:
Start with damp hair so curls, waves, and straight pieces fall in their natural direction.
Section the hair into two main areas: front/crown and back. Clip the back out of the way—this is where length will stay intact.
Cut the front and sides first, using small vertical snips rather than straight, horizontal cuts. This keeps the transitions soft instead of boxy.
Shape the crown area, removing weight in small increments. Always cut less than you think you need to; heavy-handed cutting is the fastest path to a choppy bowl shape.
Release the back, and only trim it if needed for split ends or uneven tails.
Blend lightly at the connection point, where the short top meets the longer tail. Point-cutting or shear-over-comb techniques help avoid a harsh line.
The biggest mistake DIYers make is treating the mullet like a short haircut in the front and long hair in the back, without paying attention to how those two worlds meet. The magic isn’t in the tail; it’s in the shaping around the face and crown. That’s also where it’s easiest to mess up.
If you want something more structured (like a micro mullet or shag mullet), visiting a salon is worth it. A stylist understands how your texture, density, and face shape affect the cut, and they can tailor the mullet so it works with your features instead of fighting them. A professional can also set the foundation so you can maintain it yourself with minor trims later on.
How to style a mullet (5 ways)
A mullet can look effortless, undone, polished, grungy, or glam depending on how it’s styled. That versatility is its real appeal—but the styling needs to support the shape, or else it can flatten out, puff up, or look more accidental than intentional. The right products and techniques depend on your texture and how defined you want the cut to appear.
Here’s how to style a mullet so it feels current, not costume.
For natural volume + texture
Mullets thrive when the layers around the crown and face have lift. If your hair has natural movement (waves or curls), embrace it rather than blow it flat.
How to style it:
Apply a lightweight curl cream, foam, or gel to damp hair.
Scrunch or twist sections to define shape.
Air-dry or diffuse for more lift.
Break up any crunchy cast with a pea-sized drop of hair oil rubbed between fingertips, focusing only on the ends.
Pro tip: Avoid heavy butters or thick oils—they weigh down the shorter pieces and can hide the haircut’s structure.
For sleek + intentional definition
A mullet doesn’t have to be messy. You can go sleek or edgy by smoothing the top while keeping movement in the back.
How to style it:
Blow-dry the crown with a round brush or styling comb.
Apply a small amount of smoothing cream or serum to tame frizz.
For the tail, add wave spray or texturizing mist to encourage separation and movement.
Finish: Use a flexible-hold hairspray to keep sleek areas in place without freezing the tail.
For maximum texture (“model off-duty” look)
This is the lived-in, tousled mullet that looks like it styled itself—spoiler: it didn’t.
Products you’ll need:
Matte clay, texture paste, or dry shampoo powder (for grit)
Sea salt spray or texture mist (for movement)
How to style it:
On dry hair, spray the mid-lengths and back with texture spray or sea salt mist.
Use fingertips (never a brush) to lift and separate the crown area.
Add a pea-sized amount of paste to short layers, scrunching toward the roots to highlight the cut.
Avoid: heavy waxes—they clump and make everything look greasy.
For curly mullets
Curly mullets rely on bounce and definition. Moisture is key, but so is shape.
How to style it:
Apply leave-in conditioner + lightweight mousse or curl foam.
Diffuse on low heat, lifting the crown.
If curls shrink too tight around the forehead, stretch them gently while drying.
Best finisher: a tiny amount of serum on the ends—not at the roots.
For straight fine hair
The biggest challenge is volume. Without lift, the cut can look flat in the front and stringy in the back.
How to style it:
Start with volumizing mousse at the roots.
Blow-dry lifting sections upward with a round brush.
Once dry, use a tool like the TYME Iron Pro to bend the shorter layers forward and flick the longer tail slightly outward. This creates movement without losing root lift.
Finish with texturizing spray in the back to give separation.
Skip: oils and heavy creams; they collapse the shape.
Maintaining your mullet
A mullet thrives on movement and structure, which means maintenance isn’t just about trimming the back. To keep the shape intentional instead of accidental, focus on the face-framing layers, crown, and tail balance. Here’s how to keep it looking chic:
Get mini trims every 6–8 weeks. You don’t need a full cut; just reshape the shorter areas and remove bulky weight around the crown.
Avoid cutting the tail at home. That length is the foundation of the haircut. If it shortens unevenly, the whole silhouette collapses.
Refresh layers, not length. A mullet looks best when the short pieces are defined, not when the back gets shorter.
Use clarifying shampoo monthly. Product build-up can flatten layers and make texture harder to style.
Hydrate ends regularly. Light serums or leave-ins keep the tail soft without weighing it down.
Revive definition between washes. Use a texture mist, curl foam, or sea salt spray to bring movement back without starting from scratch.
Protect your hair while sleeping. A silk or satin pillowcase reduces frizz and keeps layers from matting.
Your “how to” mullet haircut guide, wrapped up
A mullet can be soft, sharp, minimal, or expressive depending on how it’s cut and styled—which is why it’s made one of the biggest comebacks in hair. With the right shape, a little styling awareness, and consistent maintenance, mullets feel modern rather than retro, expressive rather than ironic.
Want salon advice before taking the plunge (or fixing a DIY)? Visit the LifeTYME blog for haircut breakdowns and product recommendations from salon pros.