Read Time: 2 min 19 sec
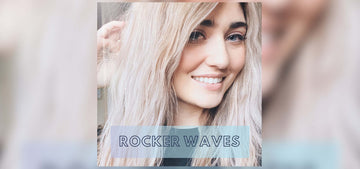
We love the opportunity to have fun with our hair...and these fluffy curls are IN! Spice up your day one, two, or three hair with "Rocker Waves". These waves are the perfect transition style when going from straight to curly and are a wonderful way to test your skills AND have a little fun. The TYME Iron Pro also leaves this style looking like "natural" waves, so if you have naturally curly hair this may be a good curl to use to enhance a few curls that aren't as defined as you like!
Bring it on, #carefreesummerhair!

One of our favorite aspects of this style is how easy it is to create! Check out our step by step details below and add this look to your style library.
Drop it LOW ;)
This look is a low maintenance style that is meant to be messy, so turn down the heat on your TYME Iron. Our irons can be set anywhere from 300 to 400 degrees. We suggest starting at a lower temperature to create these waves, and you can always bump up the heat if needed.
Iron Grip
Unlike typical curls or waves, to master this look, use the straightening side of your iron. Keep your thumb behind the power button like when you curl, but enter your hair strand with the side that has exposed plates, not the curved, curling side! Create the waves on your left side by crossing your right arm across your chest instead of up and over your head. On the right side keep your elbow at a comfortable level.**
** If you are a lefty creating this look, reverse those directions! Cross your left arm across your chest to create waves on the right side and on the left side keep your elbow UP! Need a little more direction? Check out our TYME Iron for Left-Handers Explained post!
Makin' Waves
Rocker Waves are a variation of a straight style, so be sure to keep the straightening side (exposed plates) toward you. Depending on the look you want to achieve, grab small or larger vertical sections of your hair and hold the iron at nearly a horizontal angle. Work the iron through your hair by rocking it toward your head and away. Keep up this method throughout the entire stretch of your hair.
Since this is a playful look, make sure you’re not too hard on yourself while creating it. Don’t judge each section of the hair as you finish it. Wait until the end and you’ll be surprised at how easily the sections will flow together.
Pro Tip: Start at the under sections of your hair. It may take a few sections to land the amount of wave you want for your look, and this is a perfect area that can be well hidden if there’s a little too much or not enough “rock” to these waves.
Finish The Look!
We stand by our tried and true product Limitless Universal Spray! This thermal protectant does so much more than just protect your locks. Upstaged doubles as a styling agent with a light hold, making it perfect for this playful, messy style. We also suggest playing with the amount of volume you apply to this look. Adding a touch of BigTYME Root Lift Powder will add a level volume you didn’t know you needed.
We would love to hear your results, so please share it with us on any of our platforms!
For more tips and hair tutorials, follow us on Facebook, Instagram, YouTube, and Pinterest.


